October 03, 2025
This Is How I Sketch A Human Mouth: Opened or Closed, Simple Steps
Mouths a challenge, but there are four simple steps to making it happen, and I’m going to show how to sketch those rosy lips!
October 03, 2025
Mouths a challenge, but there are four simple steps to making it happen, and I’m going to show how to sketch those rosy lips!
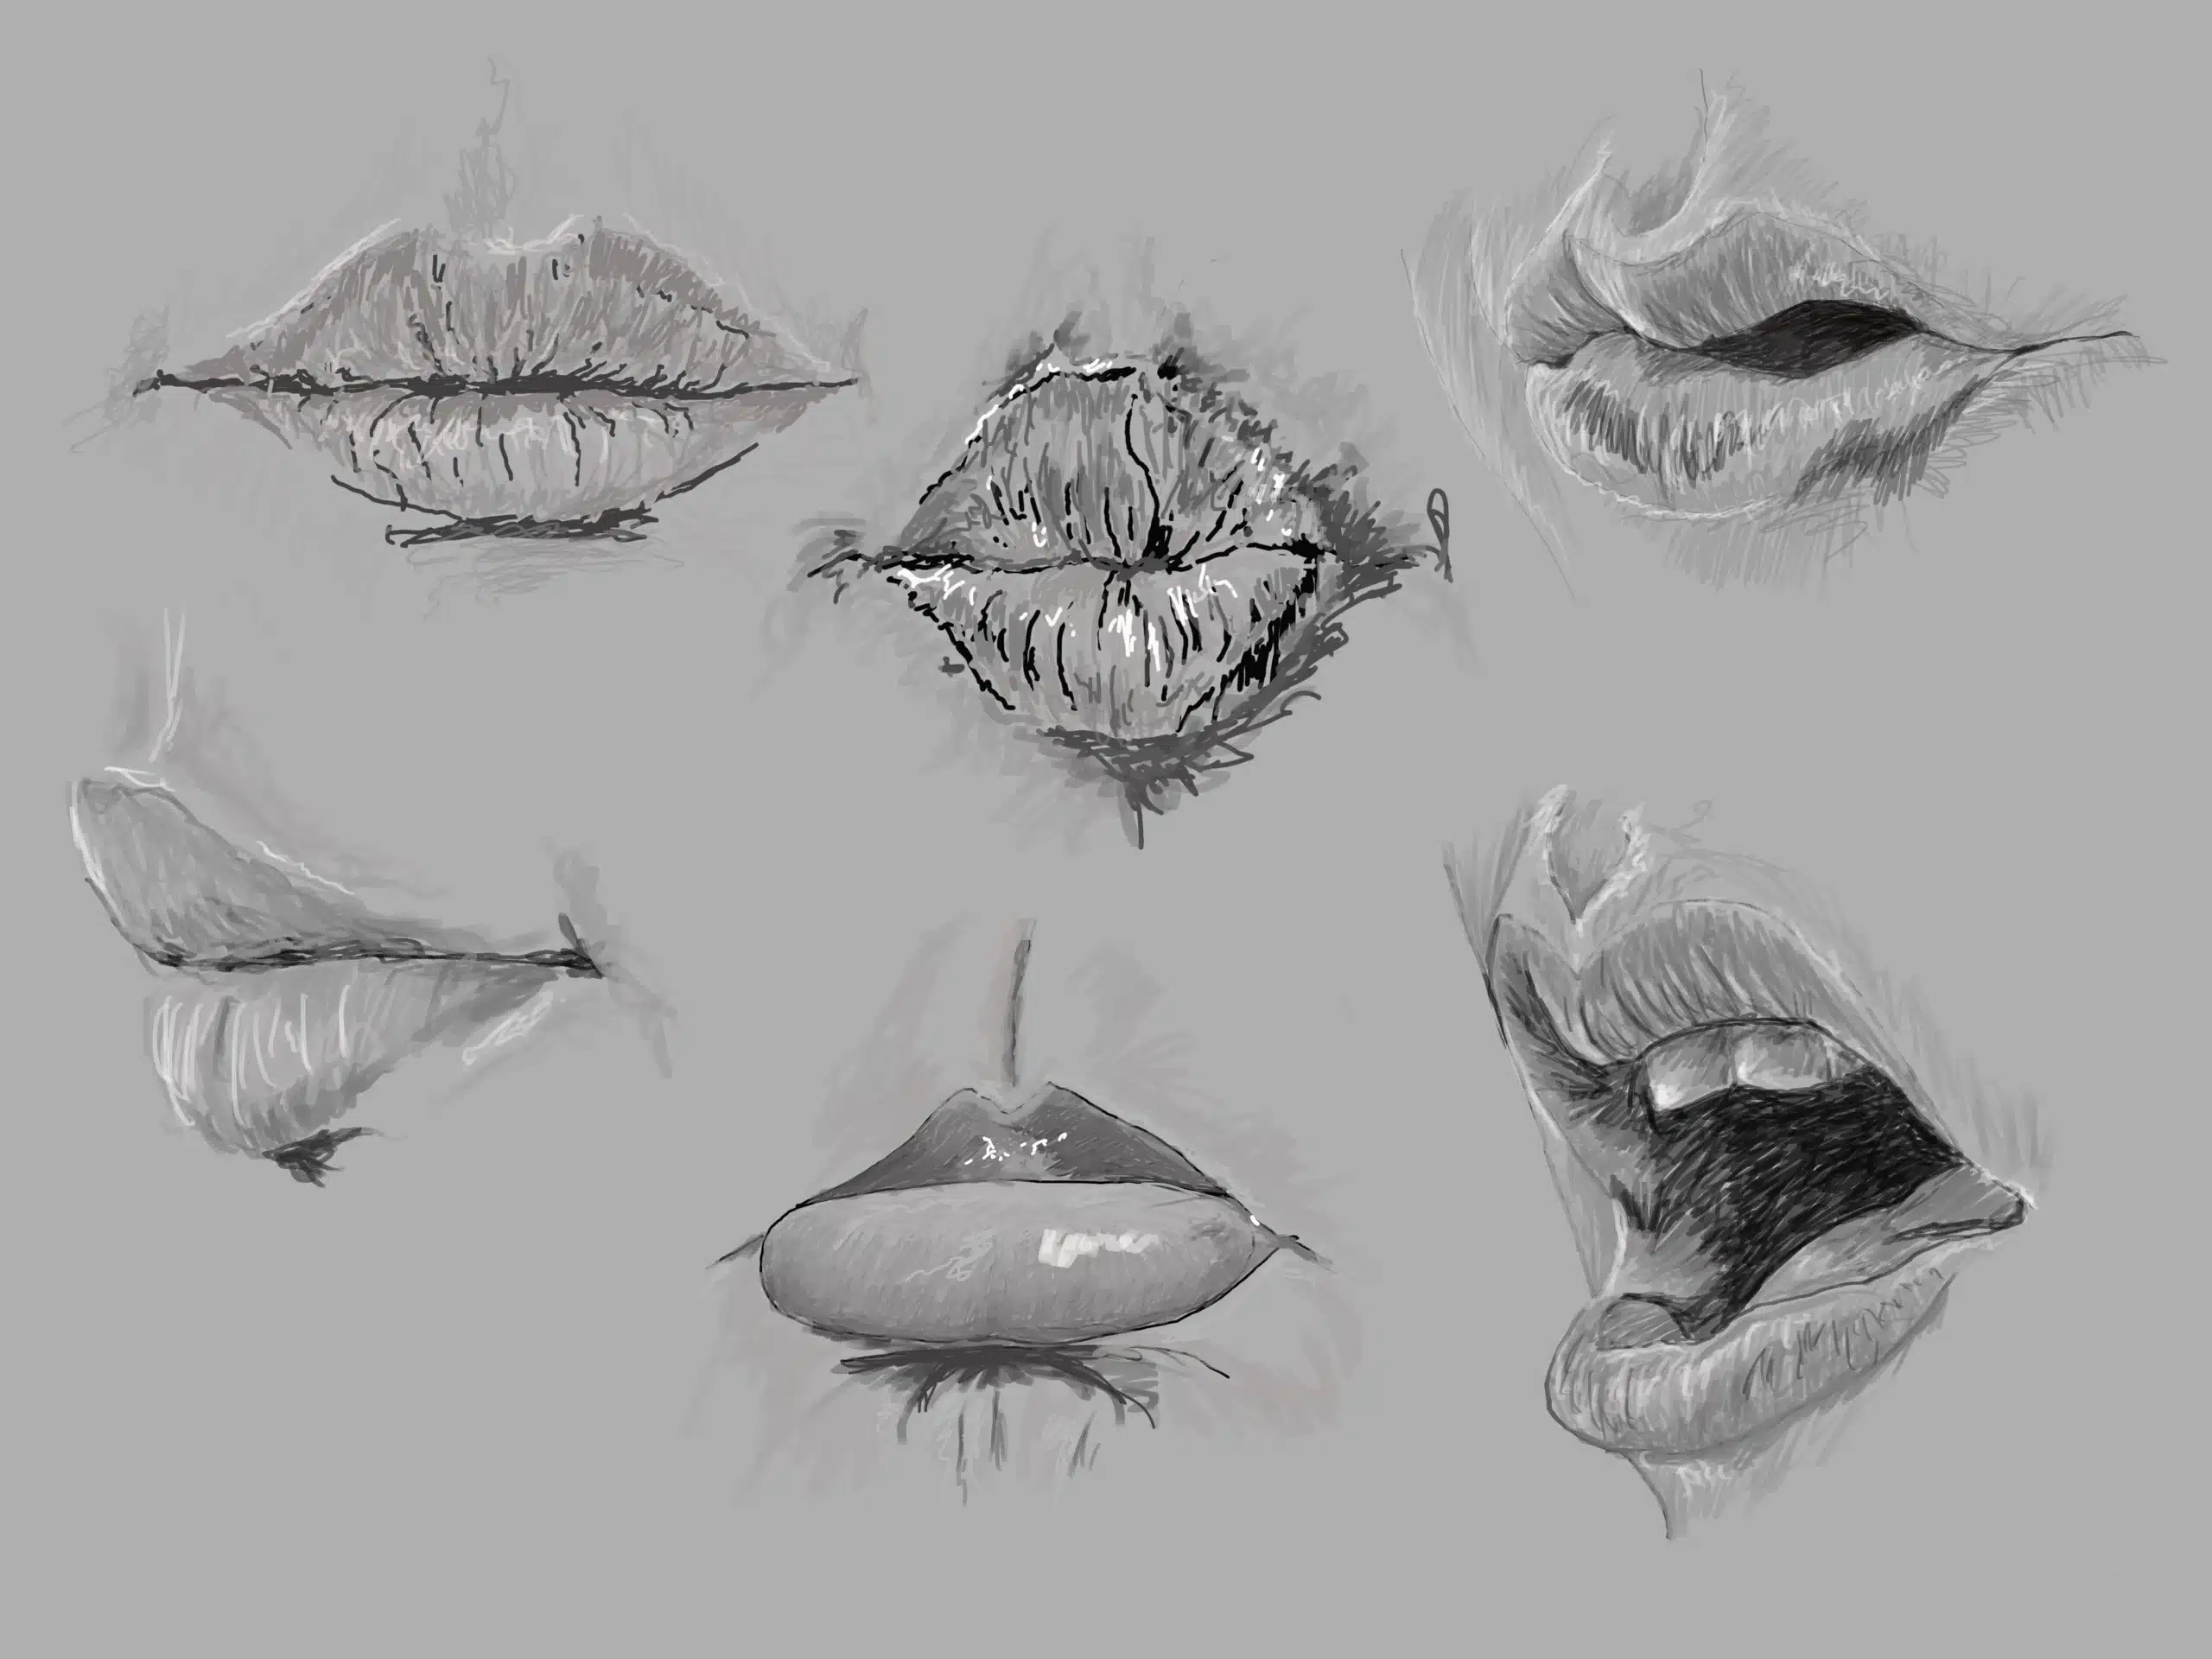
Drawing a good, credible mouth is another feature that can really showcase your skill as a portrait artist. The magic, as in all my blogs on sketching portraits, can be achieved with simple shapes, whether for quick character design, refining a portrait, or expressive illustrations. Understanding the basic shape is fundamental. And proportions and shading will look smooth as a result. All artists basically use the technique, no matter what level you’re at, and will, as I have said in previous blogs, practice, practice, and practice makes perfect, because the first go around is not going to be your best, it's not, and you'll find out I'm right soon enough with practice.
We will make a frontal mouth in the example below using step-by-step creation, starting with simple everyday shapes (at least in the beginning). The examples below use a computer connected to a pen display, but the principles/concepts are the same, whether digital or traditional.
As mentioned in my Andrew Loomis blog, the mouth sits about 1/3 of the way down the nose and chin (the Rule of Thirds). And the width of the mouth roughly lines up with the center of the eyes (or Irises).
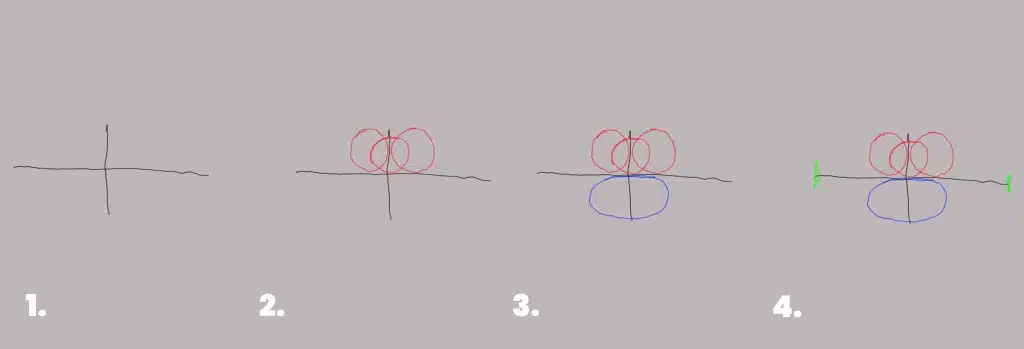
What we are going to do now is a frontal view:
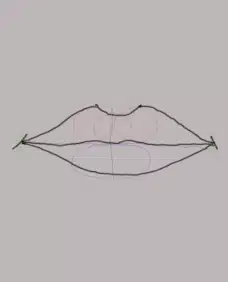
1. Let’s draw a horizontal guideline for mouth placement, including a vertical centerline (step 1 above). If you think about it for a moment, with the vertical line, you’ll make identical shapes. You’ll see it in the diagram I made.
2. Next on the horizontal line, we can make a circle on each side of the vertical line. This is often referred to as the upper lip (or cupid’s bow, the real name is the philtrum. It’s very important to mention that the cupid’s bow is different on every face. So, when we apply detail, it may not be as pronounced in a finished piece. But for now, let’s put a third circle in between the first two.
3. Then we can add an oblong oval (I guess you can say that, or a fat, rounded oval) on the bottom of the horizontal line. This will be the start of the bottom lip.
4. Indent the corners (or ends of the horizontal line, which on the mouth is called “nodes”) for the ends of the mouth, which will have a bit of shadow later.
With that all said and done, you should have your basic (foundation) shapes of a mouth. Please do some outlining as in the above. Now we can refine it by adding some values and textures, and then have ourselves a little masterpiece of a mouth.

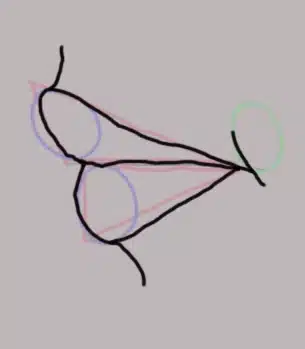
Things to think about, say as a profile view or ¾ view:
1. We can start with a horizontal line. That said,
2. Sketch a triangle that is on its side, and maybe some distortion added for the upper lip. And another triangle on the bottom of the horizontal line, recessed a little inward from the first or top triangle.
3. Then we can add circles at the front of the triangles, as in the figure above, step 3.
4. On the back of the mouth, you can add another circle.
And you should have a side view (foundational view) of a mouth.
One of the biggest takeaways is to practice so that the mental library knows what to do when it’s time to sketch. Know that your first is probably going to be your worst, and the next one is probably going to be the best … so keep practicing (it’s only going to get better with practice)!
Sketching the mouth does seem easier when you start by thinking of simple shapes. The more challenging aspect is refinement using values and tone, lighting, and a basic understanding of our own mouths. In this blog, we covered how to use simple shapes to construct a mouth in the frontal view, and I also demonstrated the concept in a ¾ view. We learned it takes four steps to do this. With the video below, we can finish out the mouth, with value and tone.