January 04, 2026
Mastering Human Head Sketching: The Loomis Method
If you followed my previous blogs, this is where we get to reap our rewards and make a actual head!
January 04, 2026
If you followed my previous blogs, this is where we get to reap our rewards and make a actual head!
If you plan to be, or are a portrait artist, cartoonist, caricature artist, or any other artist who dwells with humans (which has a head on them) in their masterpieces, you need to know at least the fundamental structure of the head (and possibly the body). It greatly enhances your skills in human anatomy, expression, and emotion. A fundamental starting point on your journey is understanding the Andrew Loomis method, especially if you are a new or beginner artist. My very first blog in this series is a good source of the Loomis method, which you can find here.
It is important to understand the head and its complex features in developing good storytelling, good expression, and good emotion. It will take practice, but with it come likenesses that convey your subject's personality and develop believable characters in various forms, be it portraiture, illustration, or even animation. That’s why, with practice, you will develop skills and build a mental library of head proportions and features that enable artists to lay strong foundations on their lifelong journey. The Loomis method is a good starting point, and it is how I started years ago.
Andrew was an American illustrator, writer, and art instructor. He is best known for his instructional writings in the world of art and for developing what we know as the Loomis method in 1940, which is still widely used as a foundation by many artists today.
For my blog, we are talking about sketching the head. Still, the Loomis method will teach you the breakdown of the human figure into simple shapes, as well as highlighting construction, proportion, and dimensional form. His method is popular for its simplicity and accessibility, making it a favorite among beginners and advanced artists alike.
At the core of the Loomis method:
• Basic shapes. As in my previous blogs, I showed you how we develop features like the eye, nose, mouth, and ear (as well as the head itself, as in my very first blog) into simple shapes, creating a solid foundation to practice with and strengthen our mental library.
• Proportions: In the Loomis method blog, I demonstrated the Rule of Thirds for the head and the placement of facial features, resulting in a balanced, realistic illustration.
• Planes of the Face. The Loomis method helps us understand the various planes of the head, resulting in a more lifelike, three-dimensional artwork. This will help us refine the sketch as we use light and shadow to develop that likeness.
• Constructive Drawing. As we think and observe our subject, the Loomis method encourages us to think constructively about what we are doing and what we are placing on the head.
So, by knowing and practicing the core of the Loomis method, we can sketch the beauty of the head with confidence and accuracy. And the Loomis method serves as a good starting point in our construction. Are you ready to start using what we learned in the previous blogs and putting together a human head?
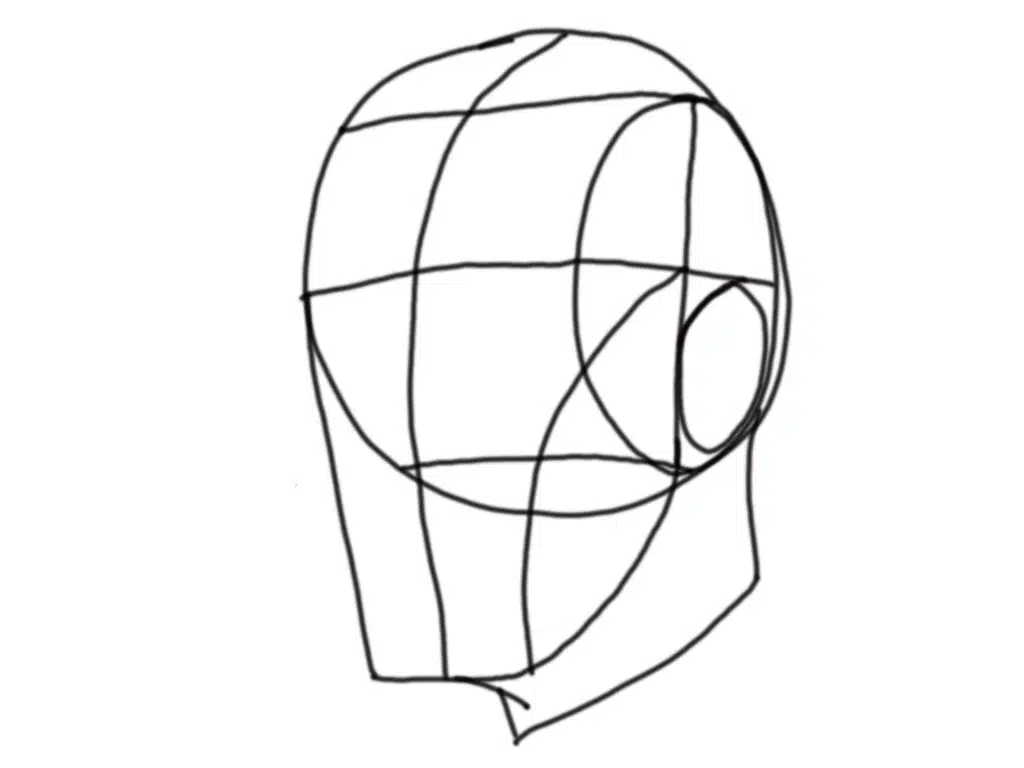
As I discussed in my very first blog, we start with a circle and how simple it is. Then we placed an oval inside and off the side of the circle. And then we drew a construction line to show where the top of the eyes is, a line for the nose, and, with equal measurements, a construction line for the chin. And this measurement we call the Rule of Thirds. Then we drew a center line and the neck, and finally put an oval on the side of the head to represent the ear.
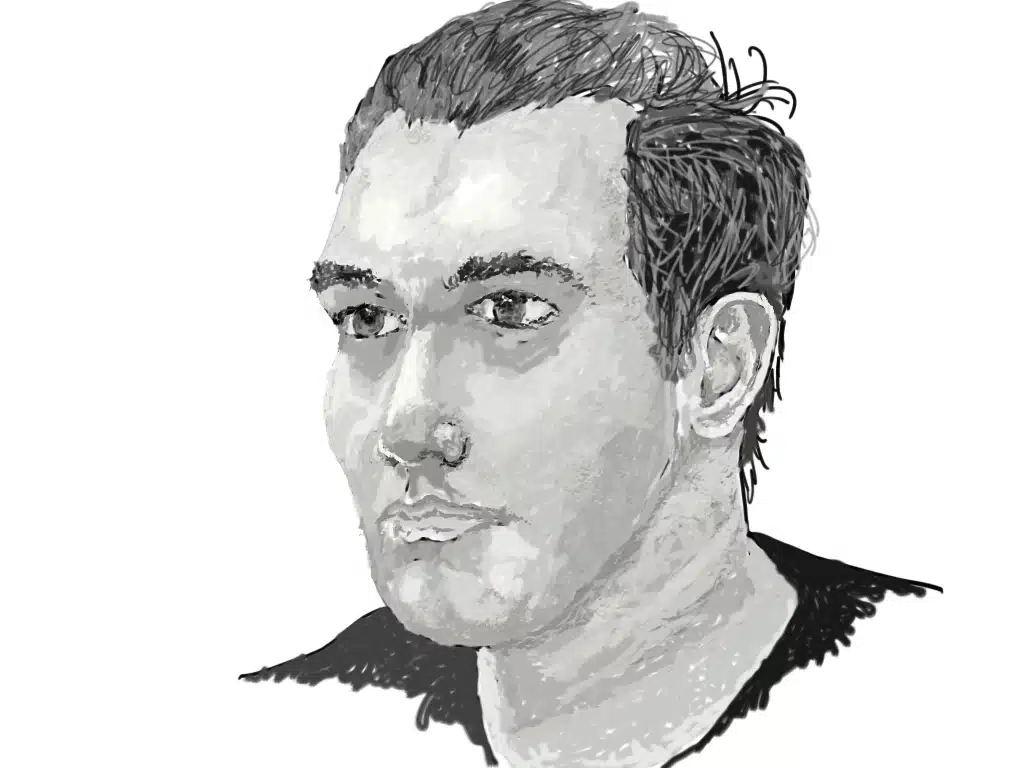
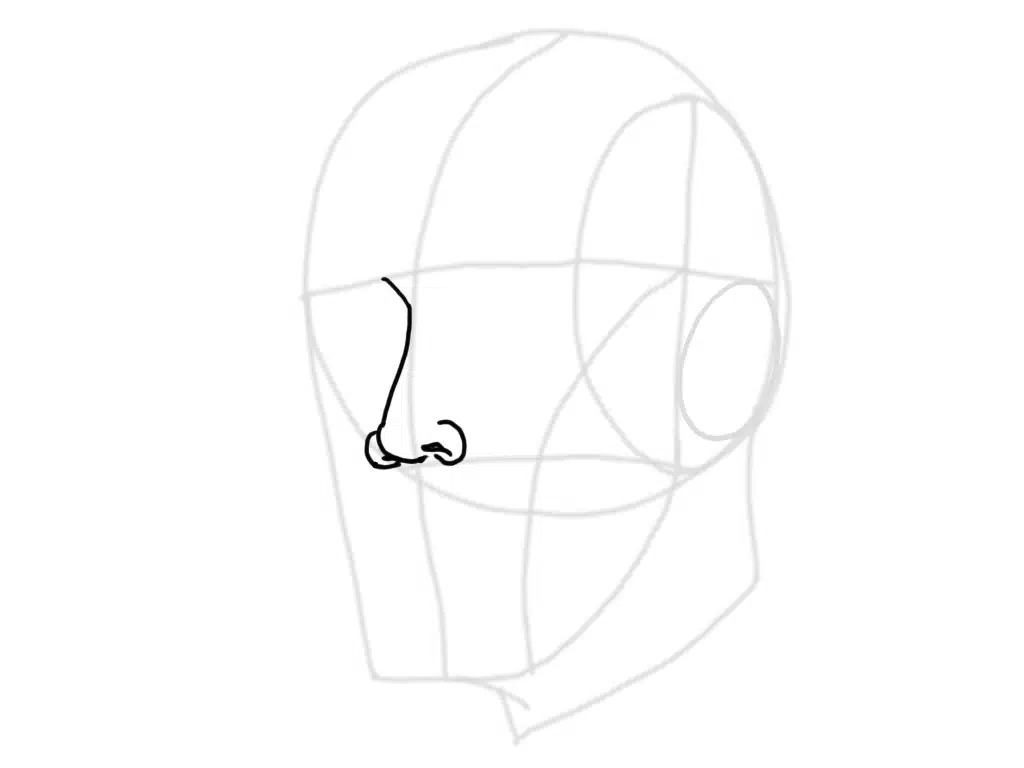
When I sketch a head and figure out my proportions, I usually start with the nose and go out… I’ll show you the basic process I use every time. What we are doing here are shapes I used in “How to Sketch a Human Nose.”
Remember this? If not, it’s a great read, and the website statistics support it. Please read it for a better understanding. For the rest of us:
I will most likely head for the eyes and get them positioned correctly. Without these guys, we would be missing a lot. As well as probably one of the most emotional elements of the head, we can see who, what, and where the head is looking at or feeling.
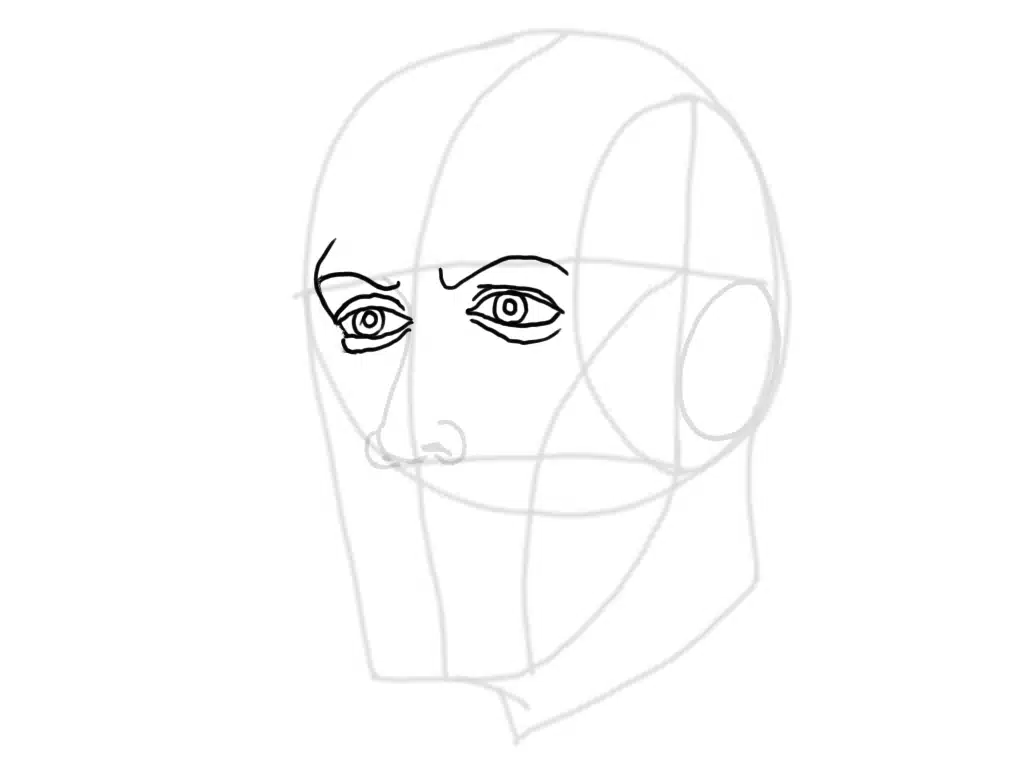
The mouth is my next concentration and somewhat the trickiest to do, especially if teeth are involved. For our sketch, we’ll leave the mouth closed.
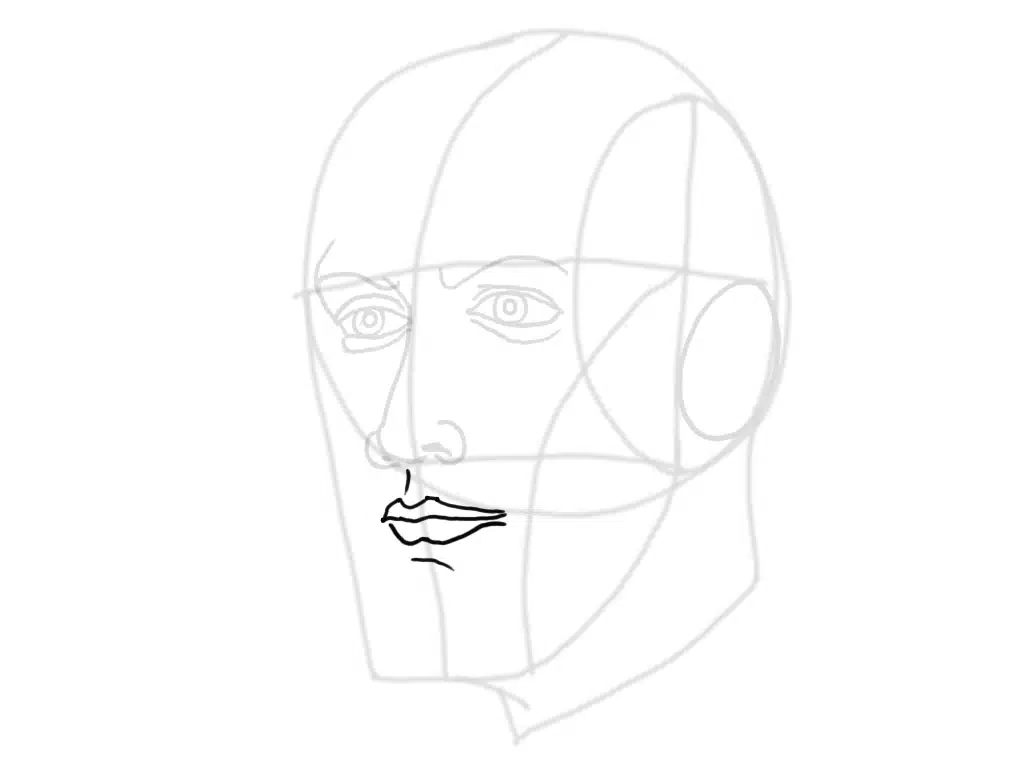
It is now time to step back (if you haven’t already) and check your sketch for any flaws or touch-ups that need to be addressed before we add value and tone, maybe erase unwanted lines if done traditionally. Another way of checking your proportions is to place your paper or canvas upside down. I usually flip my sketches several times throughout the process.
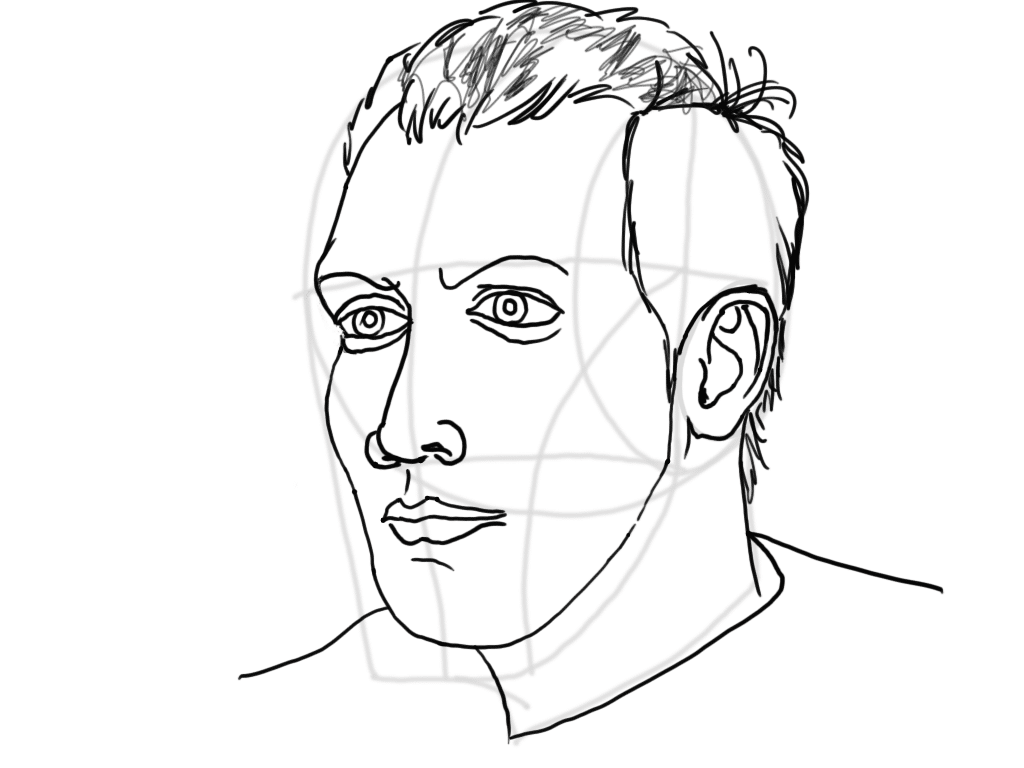
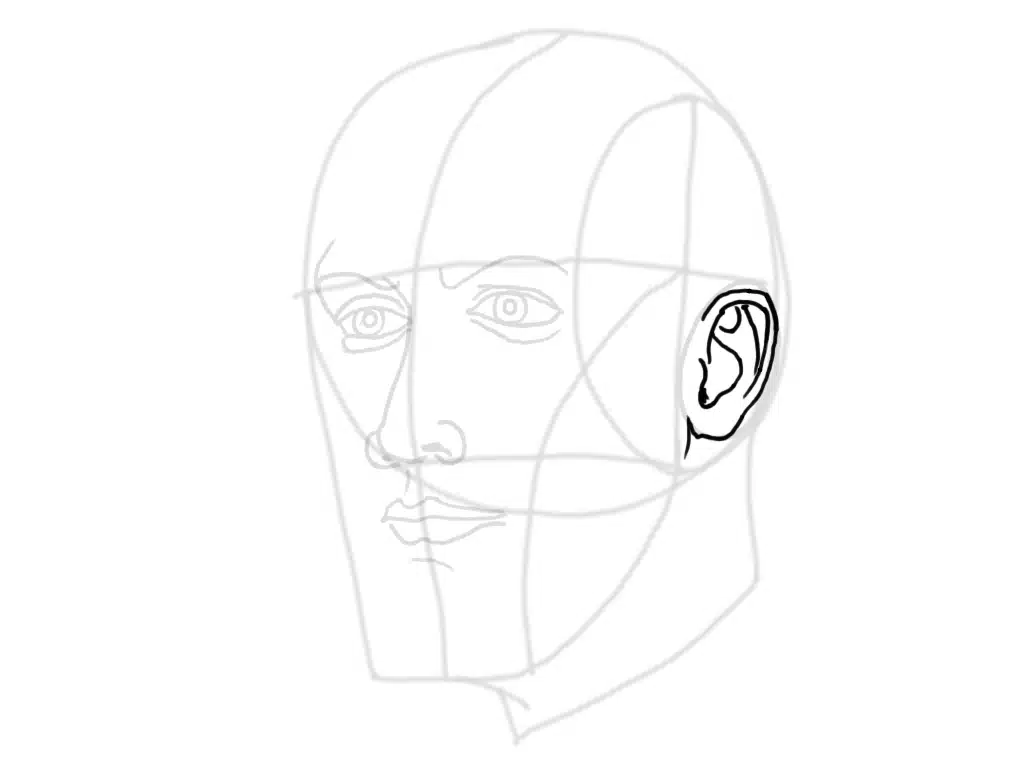
Then I’ll usually place and sketch my ear.
Now that I have all the majors sketched and proportioned to the likeness I desire, I’ll finish with the side of the head, the chin, move to the hair, and then do the neck and neckline.
In today’s blog, we talked about mastering human head sketching using the Loomis method. And how we did that was by briefly mentioning the author (Andrew Loomis) of the technique we used: core principles of basic shapes, proportions, and the plane of the head, with constructive sketching. As I mentioned, I sketch the head using the Loomis method as a foundation. Starting with the nose, eyes, mouth, and ear, I finished the head when I was pleased with the process. After identifying flaws and doing touch-ups, I can proceed to finish the portrait with values. By this time, we can call it a finished piece of art.