November 06, 2025
How To Sketch a Human Ear: Step-by-Step Guide
This blog shows you how to sketch a realistic human ear, front and back, in 4 easy steps — a clear, friendly sketch tutorial perfect for any level artist.
November 06, 2025
This blog shows you how to sketch a realistic human ear, front and back, in 4 easy steps — a clear, friendly sketch tutorial perfect for any level artist.
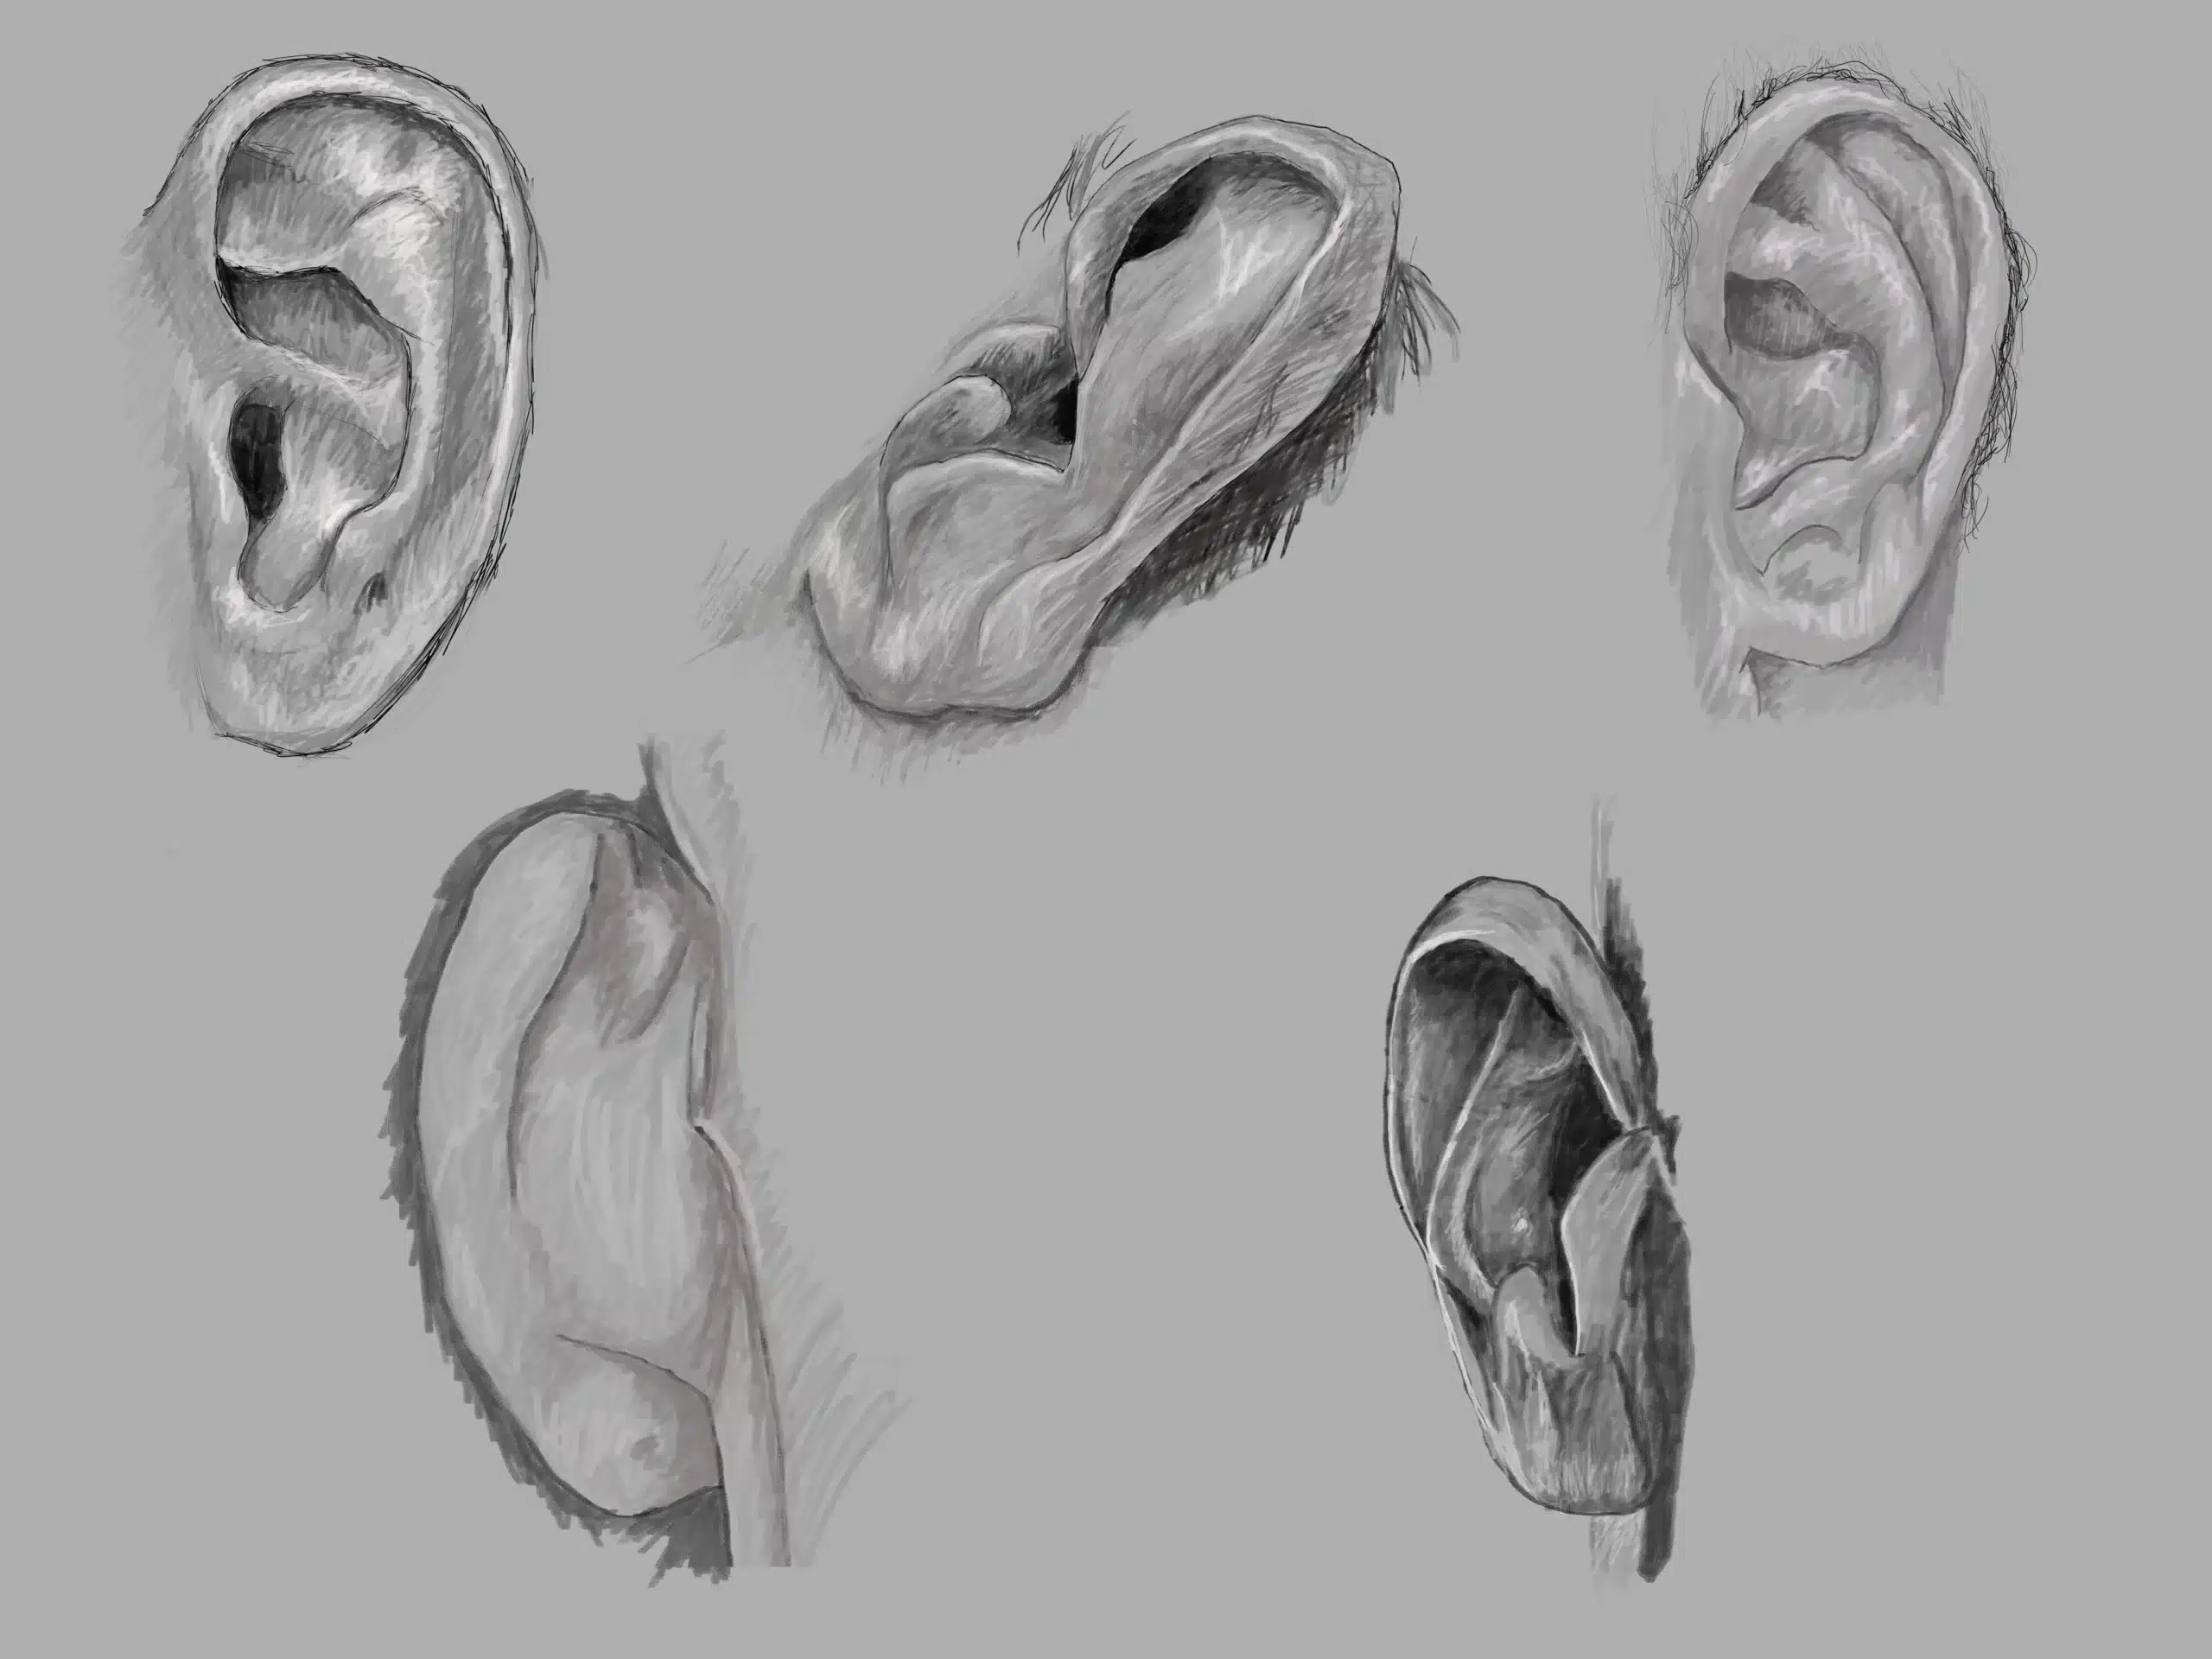
In today’s blog, we are talking about the ear. Did you “hear” that? We’ll dig into the placement of the ear using the Loomis method, as illustrated briefly in my first blog (The Loomis Method: The Foundation I Use for Portrait Sketching). Talk briefly about some interesting aspects of the anatomical ear. At the end of the blog, I will show you how I sketch various angles of the ear, as seen in the featured image above.
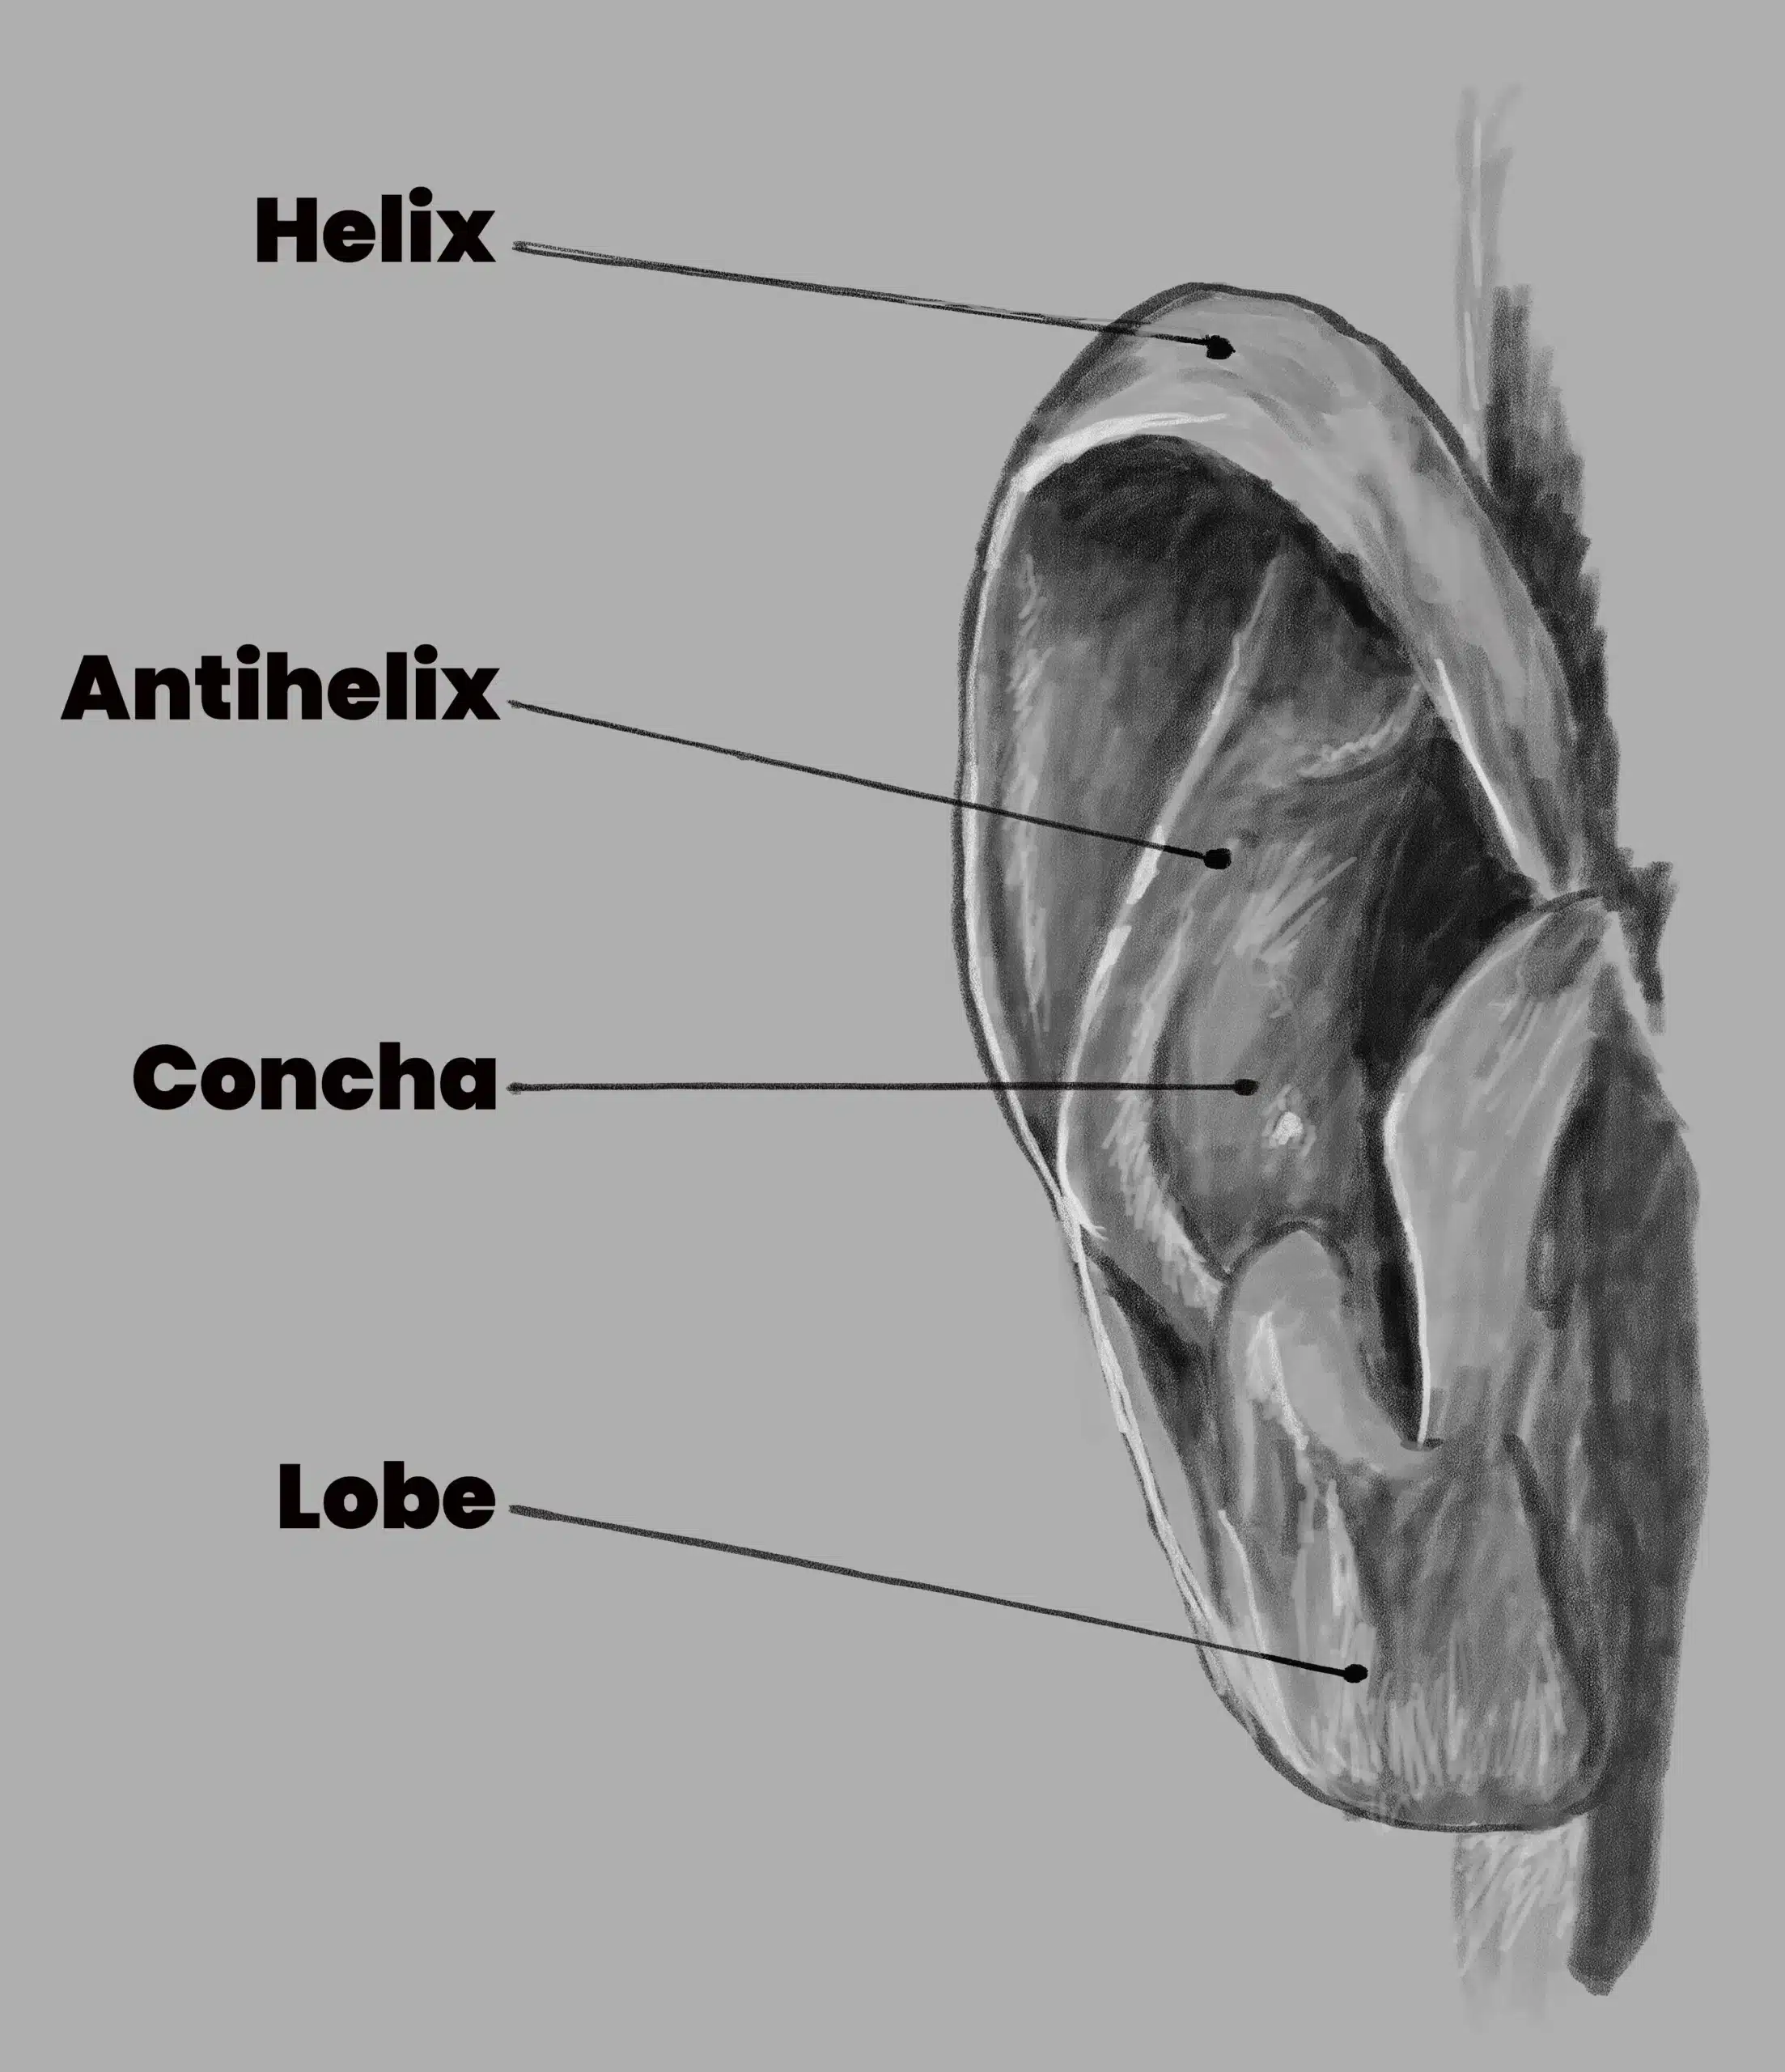
If you’ve ever tried to draw a person and felt the ear was oddly tricky, you’re not alone… they are. There are so many different ears out there, but they all basically have the same components. All ears have what’s called the helix (or what I would call the outside part of the ear, or the outline). The next anatomical component of the ear is the antihelix, which is inside the outline, where you can imagine a “y” in the upper part of the ear. The next component of interest to artists is the concha, or bowl (like a kitchen sink) with a drain at the bottom, which sits in the middle of the ear. And the next part we are going to reference as the artist is the lobe, which is where we would find an earring sitting.
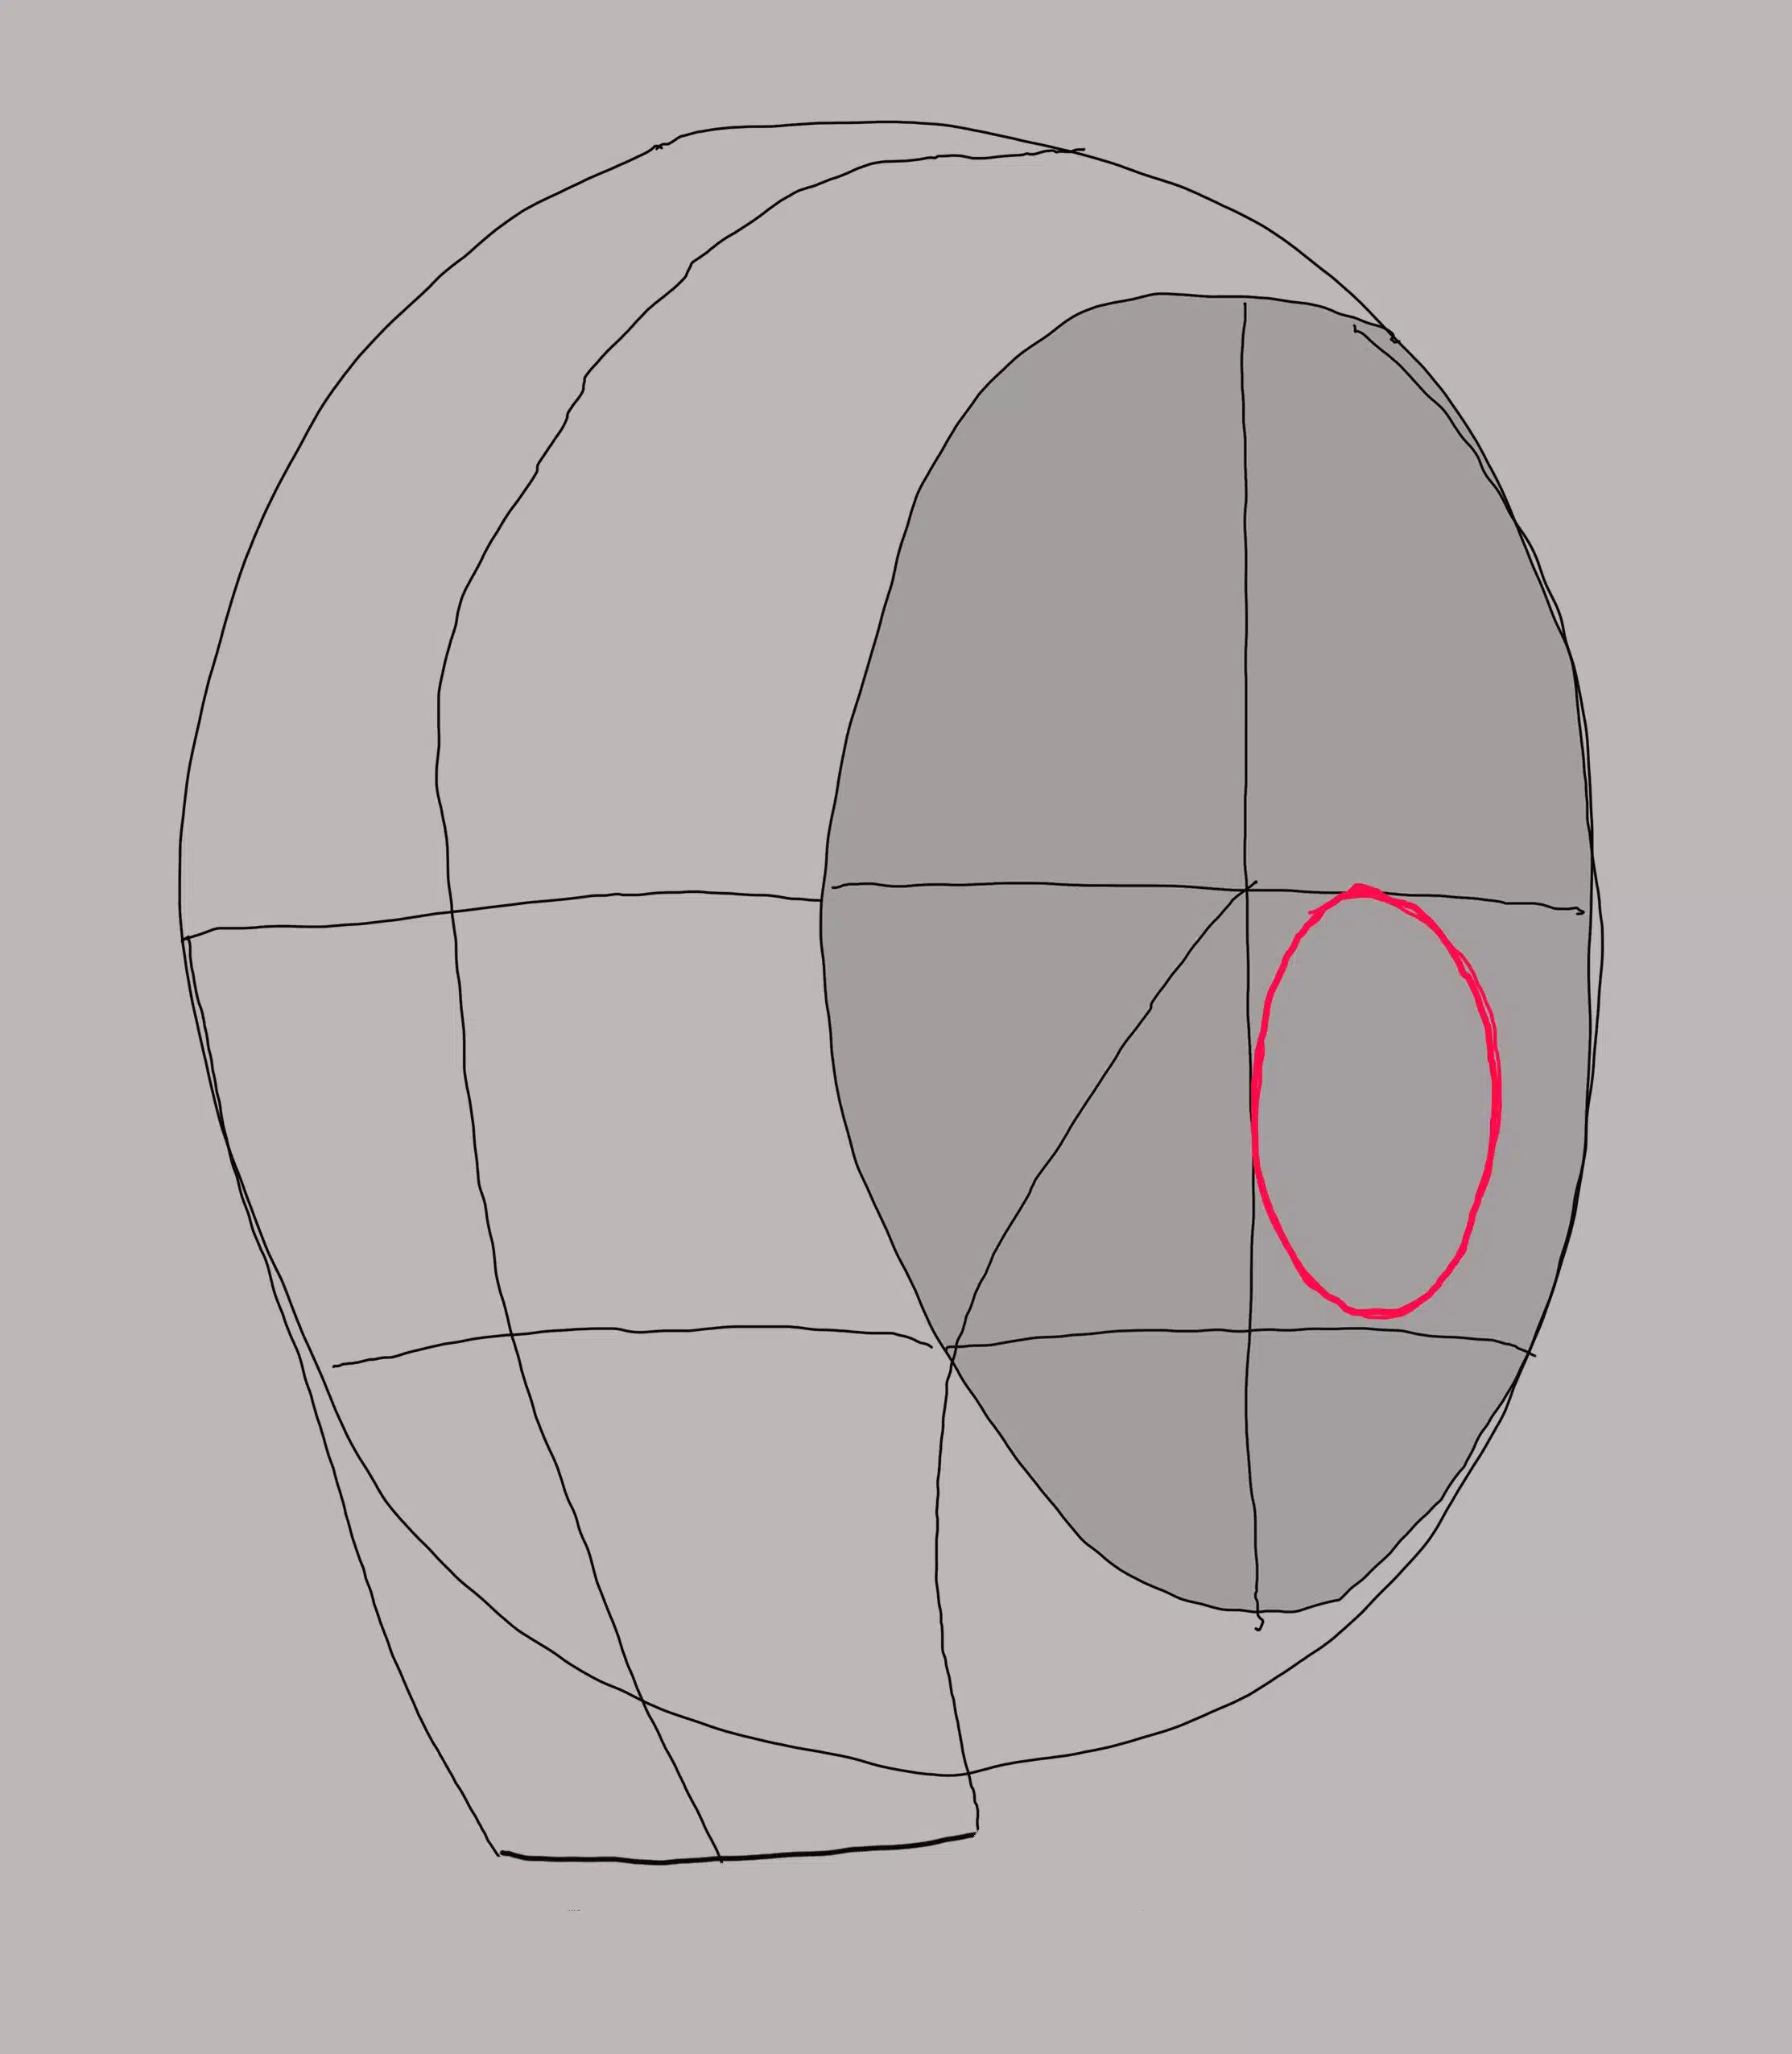
Have you ever really looked at an ear? Thinking of shapes, I’d say a couple of circles to start with or possibly the number “8.” The bigger circle is on top, and a smaller one is on the bottom. You could say, if being creative, there is a “y” mixed in there, too. This is called the antihelix. Do you see it? And when we talked about the Rule of Thirds, the ears are at the middle of the thirds and towards the back of the head.
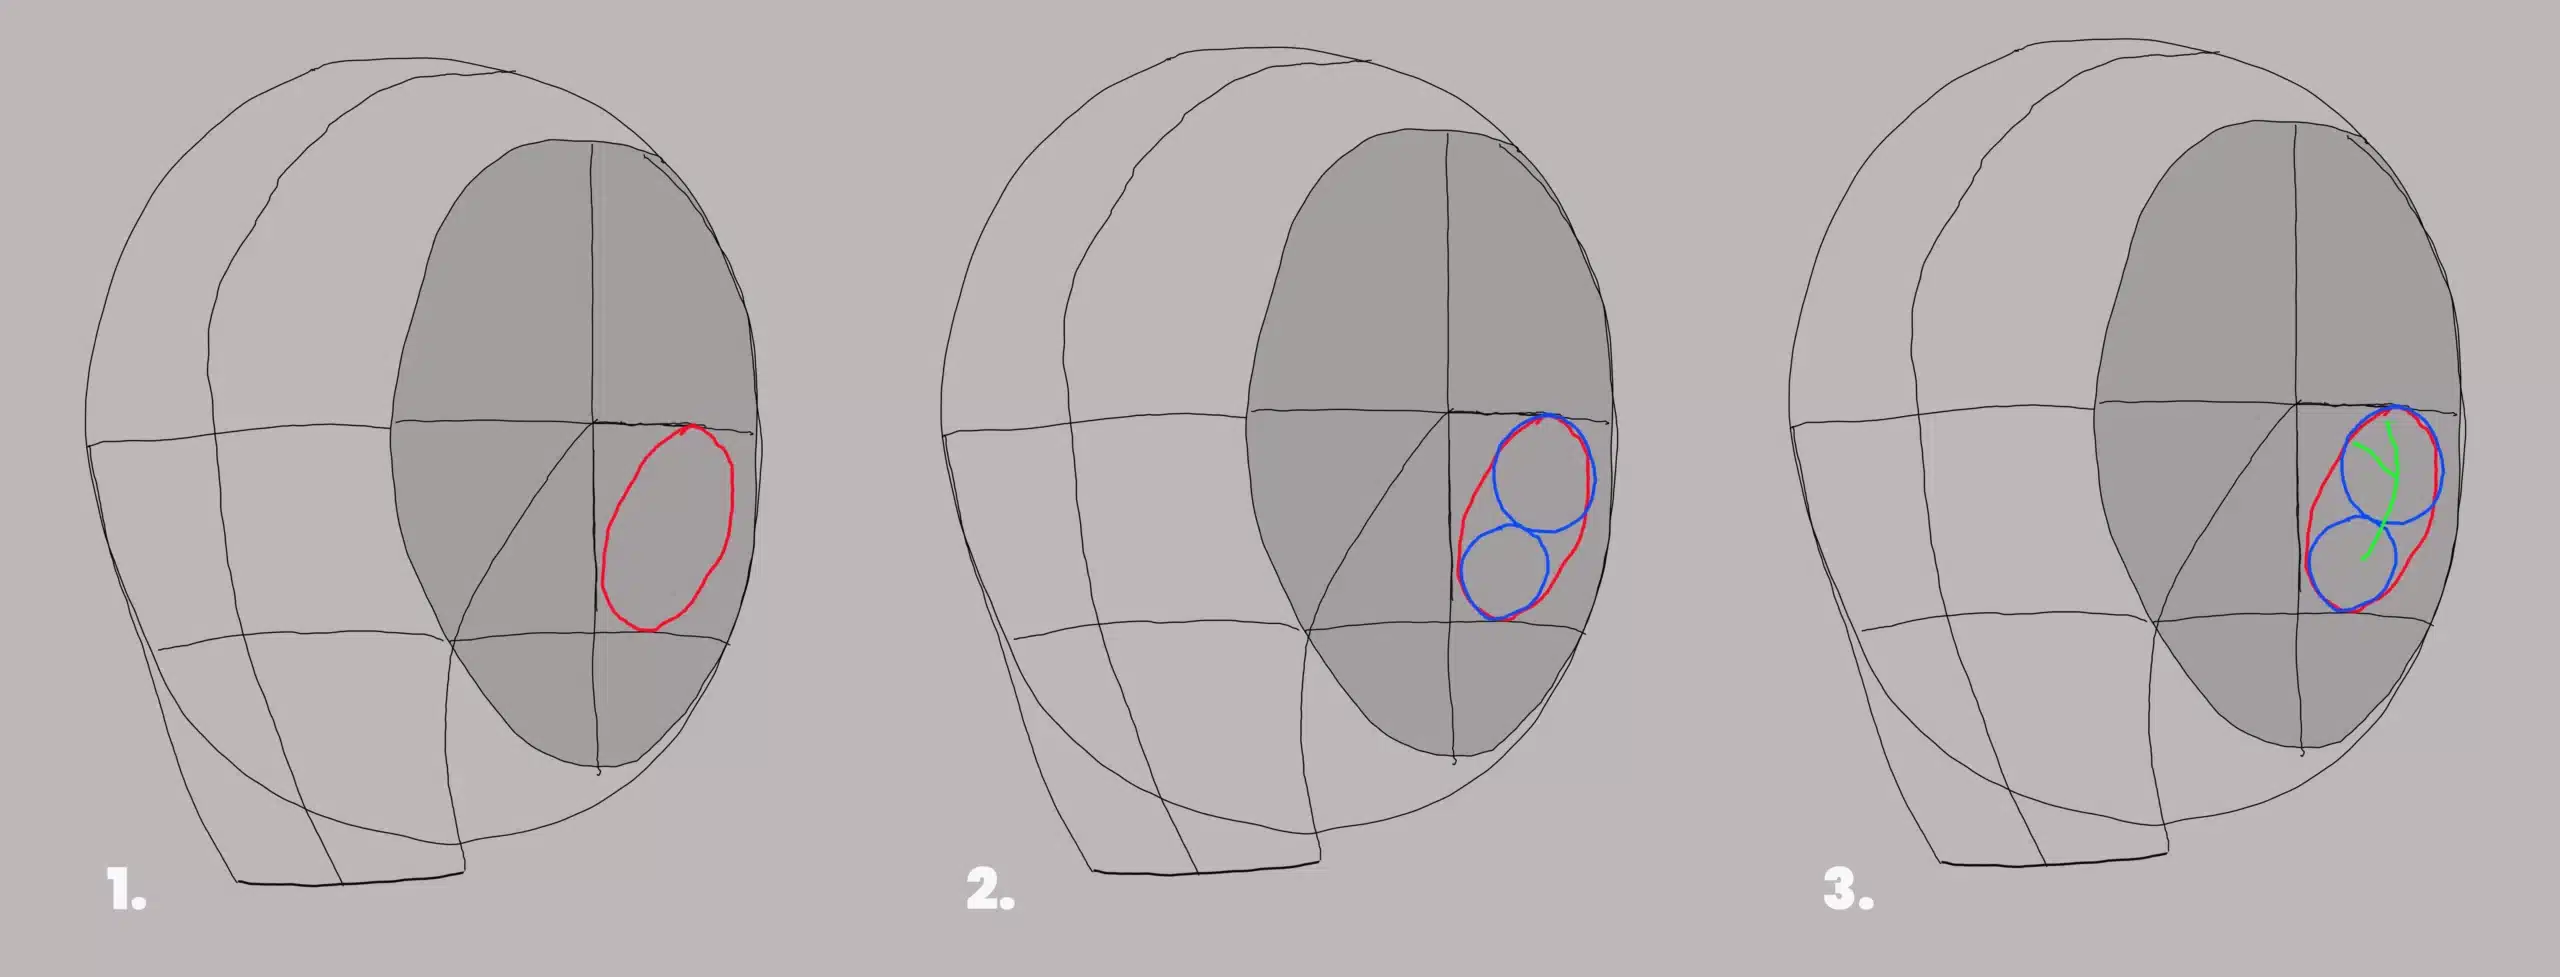
I came up with only three basic shapes to start our sketch of the ear as seen in figure 2 (above).
1. First, let’s make a soft circle for the placement of the ear, where the top of the ear will be at the brow line and the bottom of the ear at the bottom of the nose (ex. 1; figure 2).
2. With that done, let’s make our number 8, but let’s make it a backward eight, where the bottom (or belly) of the eight is on top, and the bottom circle (the head) is on the bottom. Almost like the number 8 is standing on its head. Now, not only do we have our upside-down “8”, but it’s kind of at an angle or tilt, where the top of the ear is farther back (ex. 2; figure 2).
3. Lastly, we’ll make the “y” for the ear. But we don’t really have to bring the tail of the “y” all the way down, as demonstrated above (ex. 3; figure 2). To break it down further, we have a slanted line with a triangle on top.
We should have a good foundation for the ear, which we can now refine and develop into a realistic ear. We do this by starting to look at the ear more closely. We’ll ensure the width and height are balanced correctly. And the tilt is at the right angle of our “person.” Not that we as artists usually deal with the back of the ear. It is good practice sometimes; you never know when the occasion arises, and it’s easy to do!
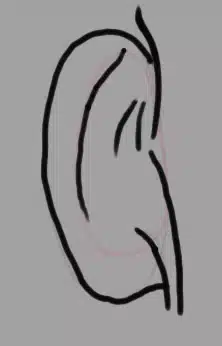
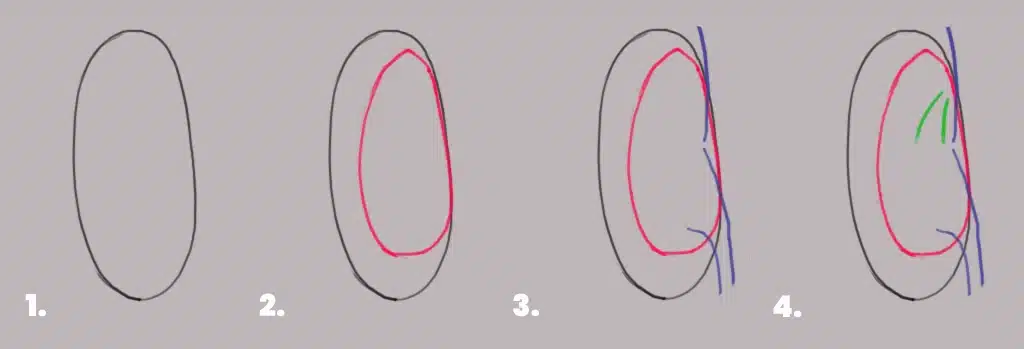
1. To begin, let’s sketch an oval (ex. Figure 4 above; step 1).
2. Inside of that oval, let’s do another one (ex. Figure 4 above; step 2).
3. Then let’s do some skinfold lines (e.g., Figure 4 above; step 3). You should see an image of the back of the concha, or the bowl of the inner ear.
4. Finally, we will put in the top fold of the skin where the ear would attach to the head (ex. Figure 4 above; step 4).
Now, that wasn’t so bad, was it? I told you it wasn’t (almost as easy as the front of the ear). And now we can add values and textures to finish it off.
So, in today’s blog, we should have a better understanding of sketching the ear (both front and back) as well as the anatomical definitions of it. I added it because the names of the ear’s parts were interesting, and we, as artists, should know them, as well as the other parts of the body, if we are into portraits or figure sketching. We learned the placement of the ear to the head, as in Figure 2, as seen in the Loomis method. If you haven't read my blog on the Andrew Loomis method of sketching the head, I recommend it. I showed you how the number 8 and a “y” inside an oval are good options for building your ear, and how I approach the back of the ear. In the end, I refined the foundation and made them look like realistic ears. I hope you enjoyed it. Until next time, have a great day!