How To Sketch a Human Nose: A Simple Guide for All Artists
Learn how to sketch a realistic frontal-view human nose in 4 easy steps — a clear and friendly sketch tutorial perfect for any level artist. This step-by-step guide covers simple shape breakdowns, correct face placement, bridge and nostril construction, basic shading techniques, and tips and tricks. Ideal for any level artist who wants to improve their sketching skills.
Introduction
The nose can seem tricky to sketch, but with practice and a few easy steps, a realistic-looking nose can be had! In today’s blog, we will break down the process into steps that will stick with you as you practice and practice and… practice. There is no other way to say it, but practicing is needed to memorize these steps, so when you have to sketch a face on the spot, your mental library will kick in.
As with all things in art, we will use simple shapes that will turn into a beautiful nose when finished. The process we will use is sketching our shapes, adding shadows for depth and value, and finishing with the little details. We’ll take our time, as what we are doing now is only practice for the real thing. If you’re ready, I am…
Step 1 – Look At the Nose as Simple Shapes
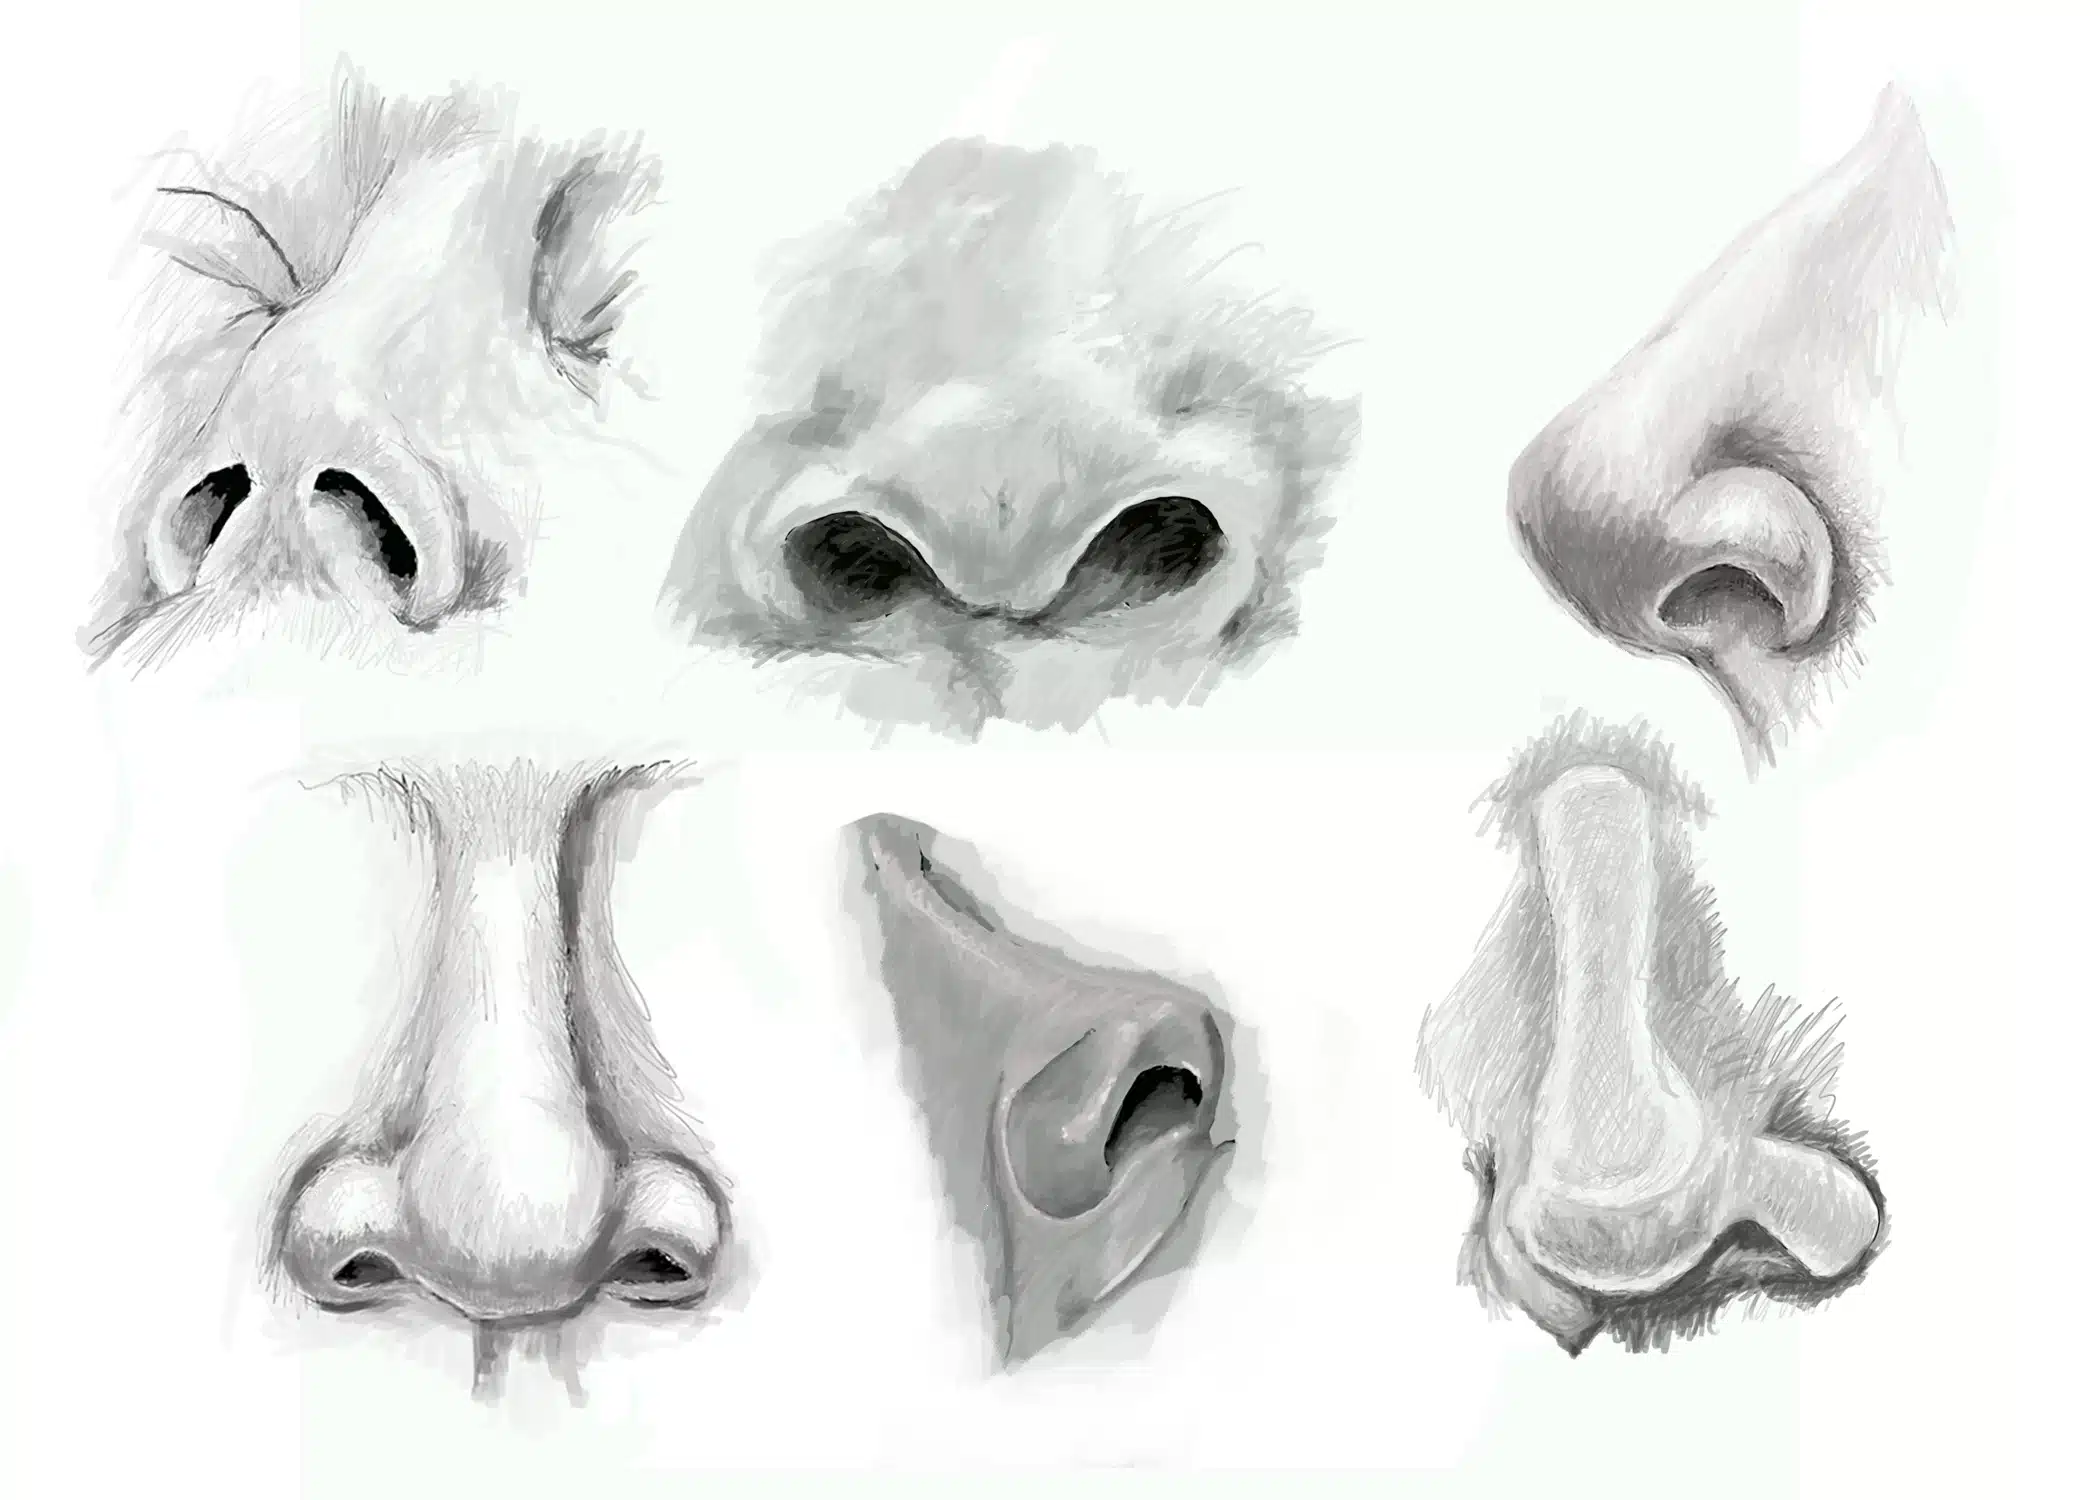
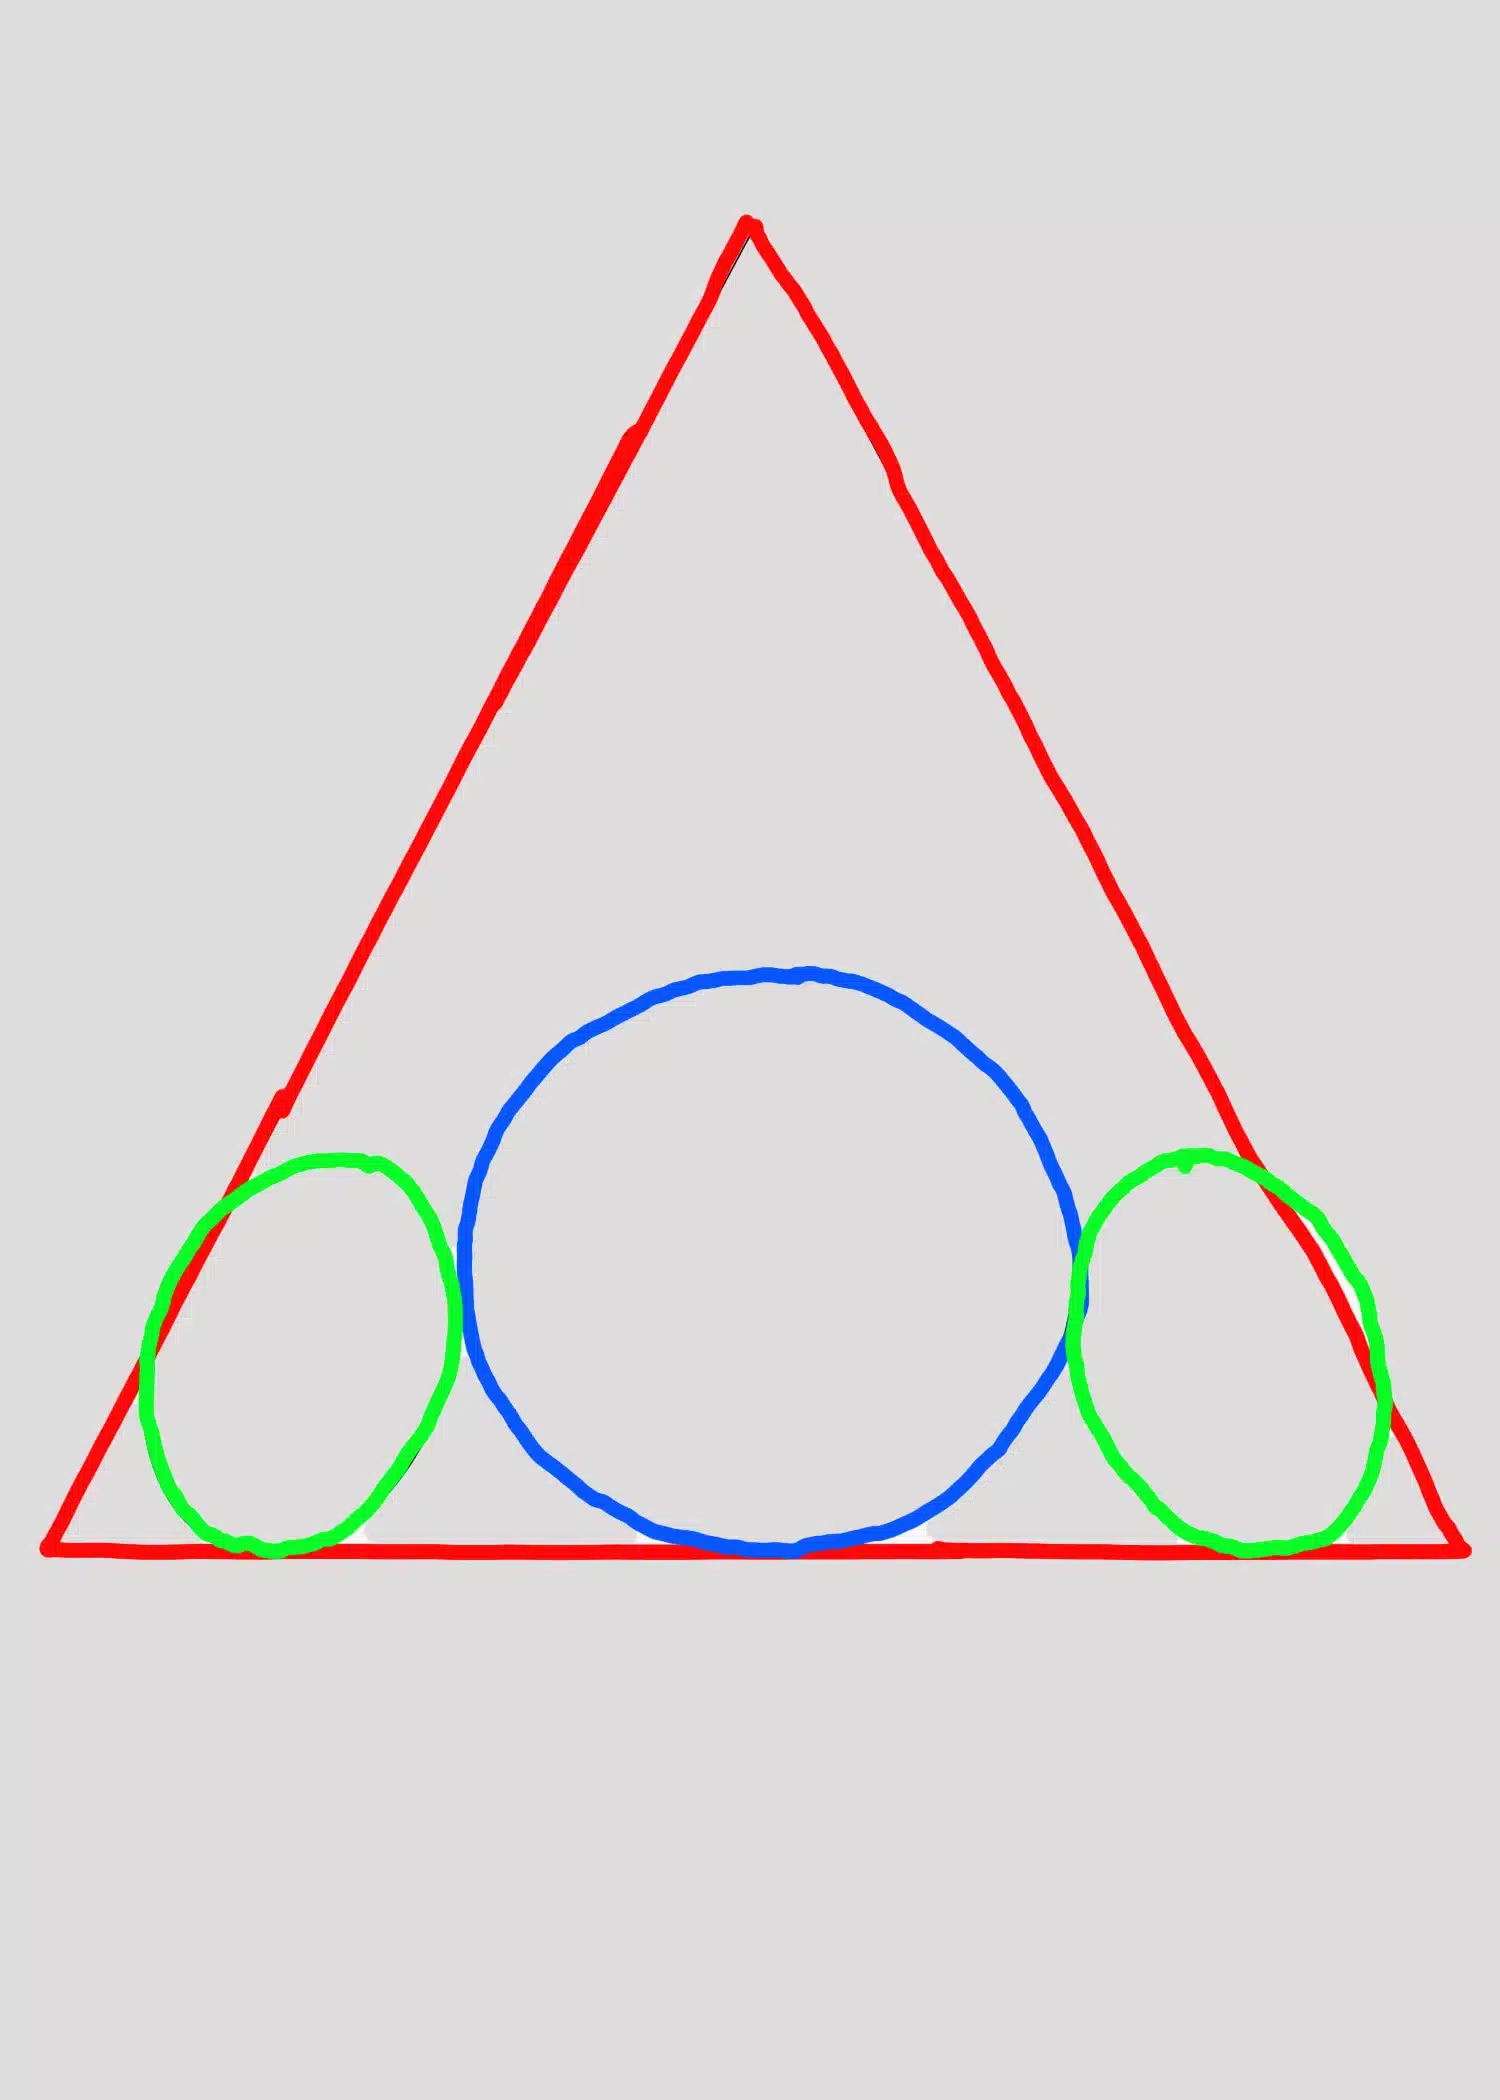
First off, if we look at a nose and think about what we see, we see a triangle, a circle at the bottom of the triangle and two ovals as the “wings” or nostrils which one will be on one side and the other on the other side of the circle (though depending on the angle of the nose (or face) we may only see one nostril). In our example below, the nose is facing us:
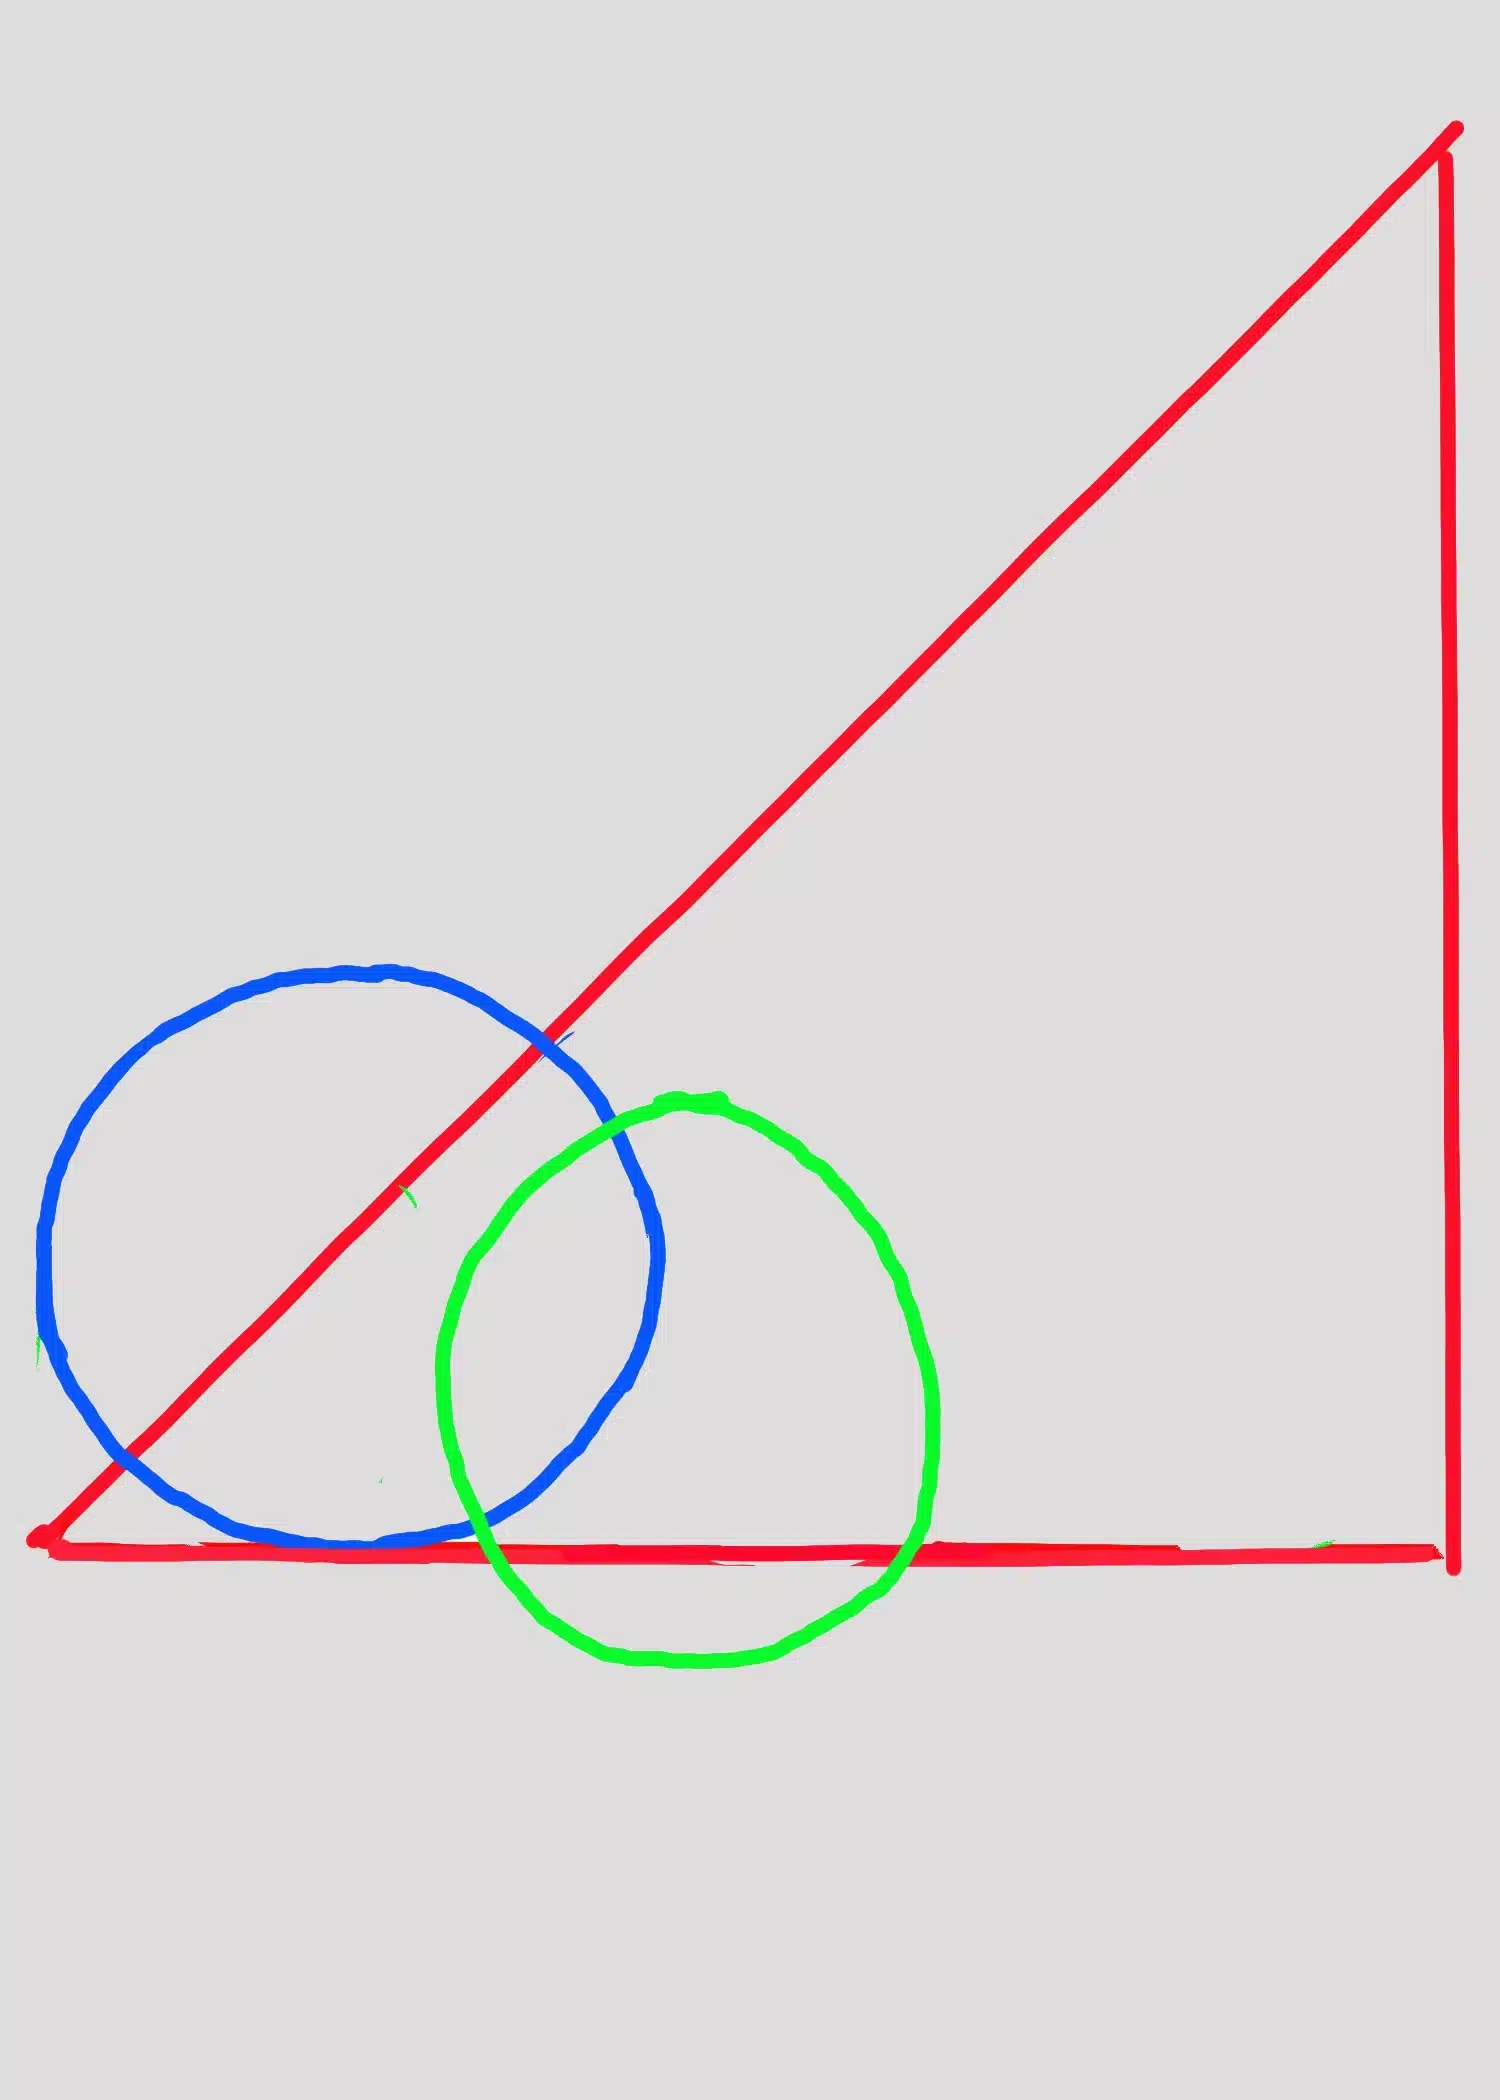
The figure below shows a nose looking left or right of us (in profile view), using the same simple shapes as shown above.
No matter which example you use, start with very light lines. So if we are going to do this, let’s do it!
Step 2 – Sketching the Nose
Now is where the real magic is going to happen, and turning the triangle into a Nose.
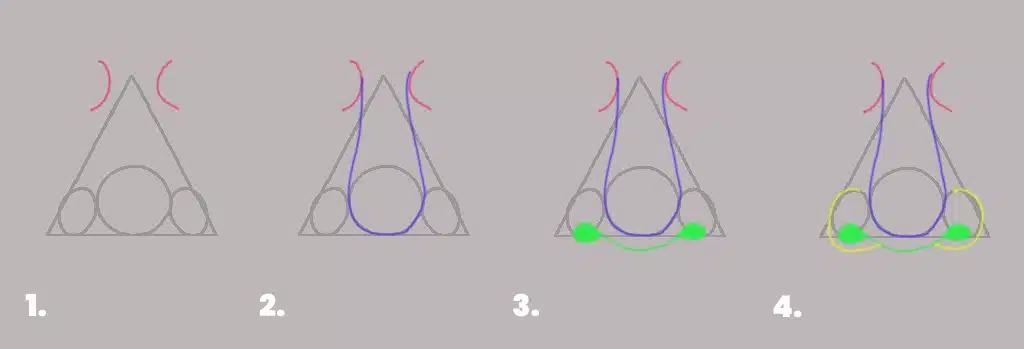
1. Starting at the top of the triangle, we can place a slightly curved line on each side. This is the area between the eyes, and they say that the distance is approximately the same width as an eye.
2. Next, we will sketch a line down and under the circle; we can do this on both sides. If you think about it, you made a shape of a “U.” It’s a long U, but a U.
3. Following that, we will make our nostril openings (not the nostrils themselves). We’ll also come down a bit from the bottom of the circle to do this. Making loops on each side of it and connecting the tails. Note that nostrils are not complete circles, maybe ovals, and the shapes of each may be different too, depending on the angle and such. You could also shade in the nostrils and a little shading under the circle to show shadow under the nose. It should start looking like a nose!
4. Now we can make the nostrils themselves, starting at the top of the ovals and making a “c”- shaped shape that goes under the nostril openings.
Step 3 – Shading or Adding Depth and Value to Our Shapes
Hopefully, a good practice to get yourself into is not making your lines so dark, but if you did that, it’ll be alright too. If you know me from my first and second blogs, I stress that practice makes perfect, and you’ll catch on. I say this as far as making your lines lightly because you’ll probably need to do some erasing here and there. And what we are going to do next is the beauty of it all. I hope you watch the video below; you will see that I am using a computer to demonstrate this, but this is exactly how I go about it if I were doing it traditionally (on paper).
Some things to think about, like where the light is coming from on your nose. Where the light is, that is where the shadows will be the lightest, and where the light is not, that is where the darkest of shadows are.
• With that thought in mind. Shade in the dark areas, that’s away from the light source.
• The nostrils will probably be the darkest part of the nose. So, we’ll shade those the darkest, no matter where the light is coming from. But we always want to be aware of our light source as we work on the nose.
• The bridge of the nose, as well as a portion of the wings, will probably be some of the lightest areas of the nose. Next, we will shade the bridge, using less shadow on top, and as we guide down the plane, we darken both sides; the opposite side of the nose may be a bit darker yet.
• Shadow the underside of the nose and lighten it as we approach the lips.
Finishing Up and Refining the Sketch
At this point, we could step back and look at the sketch and make any refinements that may be needed, smoothing areas, erasing unwanted stuff, and generally making sure the nose looks like a nose and is round. The nose should be very close, if not even, looking realistic and clean.
• We’ll soften any hard lines of the nose (except maybe the nostrils themselves).
• May darken the nostrils a bit if need be.
• If your nose is actually on a face, you can add texture like dots or strokes for any pores or freckles (don’t get crazy with it).
• Is your light source accurate, going in the direction it’s supposed to? Then I would say we are finished with our nose.
Now that we are done, we need to keep practicing this process to help our mental library. Good job!
Conclusion
We have successfully learned to sketch a nose with simple shapes and to add depth and value using a light source, with the surface closest to the light lighter and the surface farther from the light darker. By adding value to the nose, we have created a three-dimensional appearance that makes it look realistic and functional.
Remember to practice, because as you practice, sketching’s going to get better, faster, and stay in your memory longer. As you practice, know that all noses look a little different, so the light and features of a nose will change a bit, but what you learned here will basically remain the same, the foundation.