The Loomis Method: The Foundations I Use for Portrait Sketching
This is how I usually start a portrait sketch. It’s simple, easy to use, and well used by many artists. The technique was developed by American illustrator, teacher, and artist Andrew Loomis. The gist of it is: a circle and structural lines for placing the angle, the planes, and then the placement of the face features. And I’ll show how I do this.
Introduction to the Loomis Method
The journey of sketching a portrait often begins with establishing a solid foundation, as in building a house that sits on a firm foundation. The Loomis method, named after the renowned illustrator and educator Andrew Loomis, provides artists with a reliable foundation for tackling the challenges of drawing the human head. By breaking the head down into simple geometric shapes, the method allows both beginners and experienced artists to find structure and confidence in their work with ease and a memorable approach.
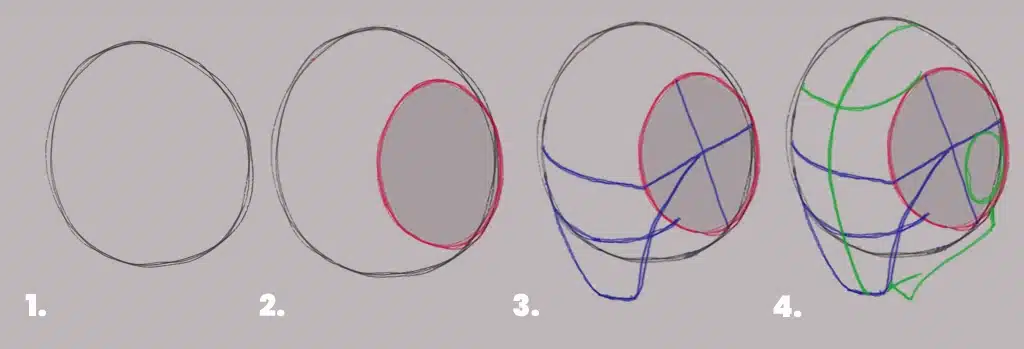
A step-by-step illustration of the 4 Stages of building the Loomis Head using simple shapes.
Starting the Sketch: The Circle
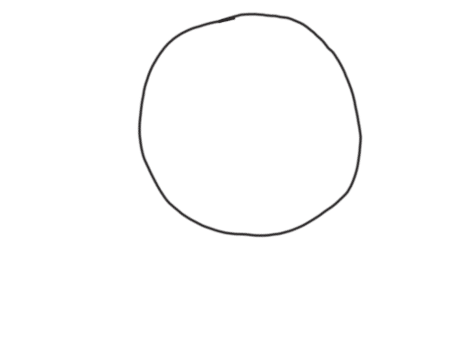
The method starts with a light pencil line forming a circle—the base of the head. This circle does not need to be perfect; its primary role is to anchor the overall mass and establish the portrait's initial direction. As a side note, multiple circles may be drawn as a warm-up, helping the artist decide on the best one for the chosen angle and attitude, whether the subject is facing forward, in profile, or at a three-quarters view, as that’s what I’m going to use in this blog.
Practice and Patience
Mastering the Loomis method requires patience and consistent practice. Early attempts may feel awkward or imprecise, but with repetition, as in any piece of art, the motions become more natural, and confidence grows, building one’s mental library for quick reference later. The foundation—the circle and centerline—should be seen as a helpful background, not a limitation, allowing for creativity and the development of personal style.
Building Structure: Centerlines and Jaw
Once the circle is established, the next step is to envision the jaw and chin extending below it. A vertical centerline is added, straight for a head-on pose or curved for an angled head. This recommendation ensures that the facial proportions remain symmetrical and serves as a reference for later placement of the facial features (eyes, nose, and mouth).
Step 1: The Circle
Starting with several circles can help the artist warm up and decide on the head’s direction. Whether the portrait is direct, in profile, or at a three-quarters angle, the circle remains the same.
The Legacy of Andrew Loomis
But first, who is Andrew Loomis, the creator of this most famous method still used today? As I did my research on Andrew, the first thing that struck me was when he died. Which, when I look up someone famous, seems like it’s the first thing I do, funny enough. Andrew died six years before I was born in 1959 at the age of 66. Wow! I was so close to being born. He was born in New York but grew up in Ohio, and then his professional life was mostly in Illinois, I’m born and raised in Illinois. His studies were at the Art Institute of Chicago and the Art Students League of New York. So that was some fun facts to learn about him.
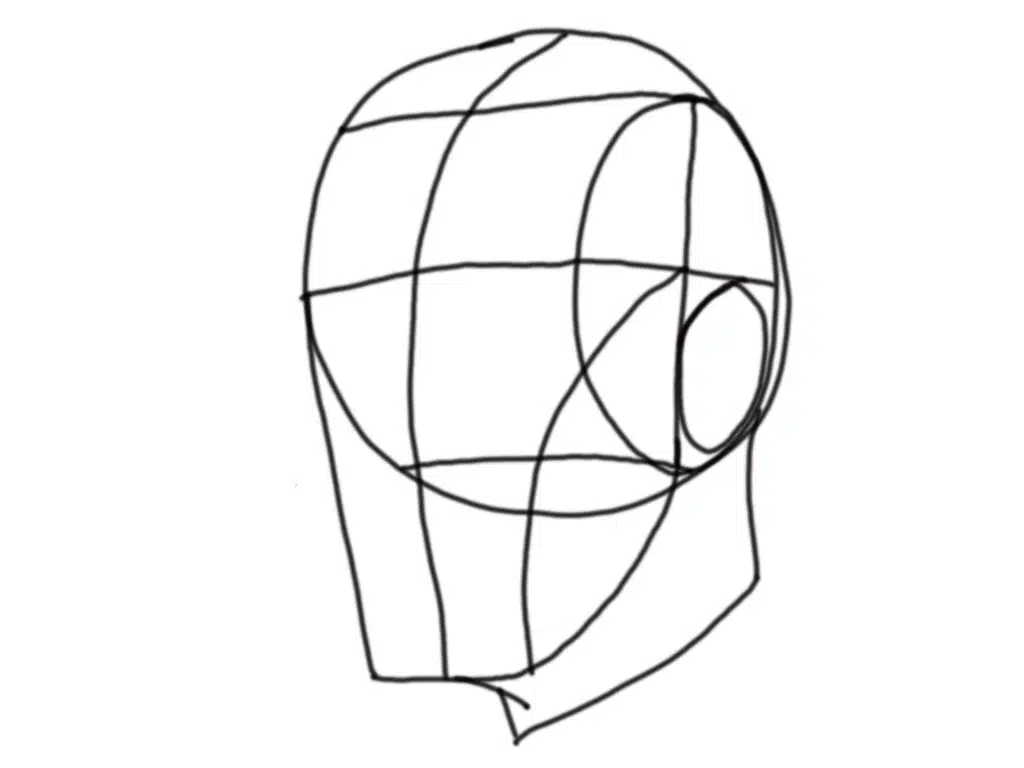
The stages we are going to use are as follows:
• The circle • The sides of the head • Positioning of the brow and nose • The chin • Centering of the head • And finally, the neck and hairline
As I write this, I will be using a computer to sketch, but the Loomis method has been around long before computers and can be used with any sketching or drawing method.
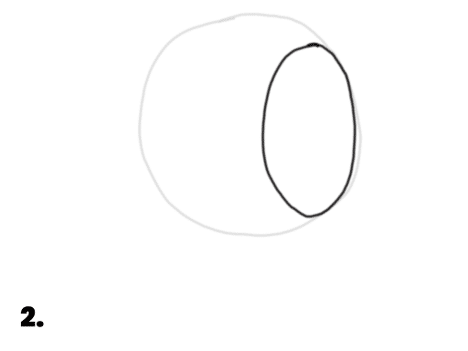
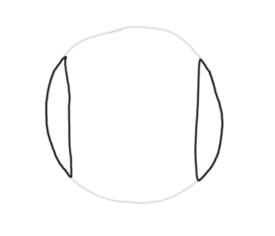
Step 2: Shaping the Sides
An oval is drawn inside the circle to suggest the side of the face. In a frontal view, both sides should be developed, while in other angles, one side may be emphasized, as in our example. This orients the head toward the direction it will face.
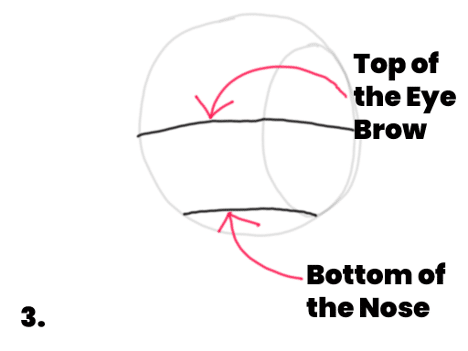
Step 3: Positioning the Eyes and Nose
A line is placed through the center of the oval and circle, indicating where the brows will sit. Another line beneath the oval marks the lower boundary of the nose. Where you position the brow line also indicates how the head is looking, such as up, down, or straight ahead.
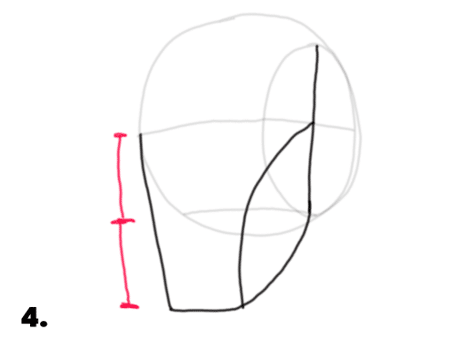
Step 4: Proportions and Chin
The distance from the brow line to the bottom of the nose is measured and repeated downward to determine the placement of the chin. This uses what’s called the Rule of Thirds, where the eyes, nose, chin, and hairline are equally spaced.
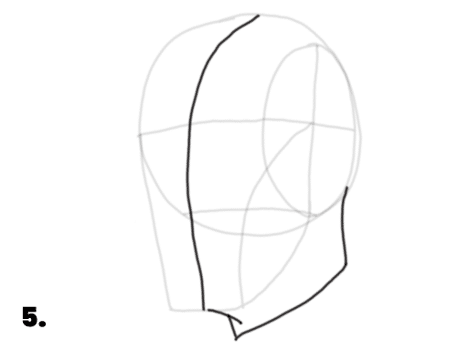
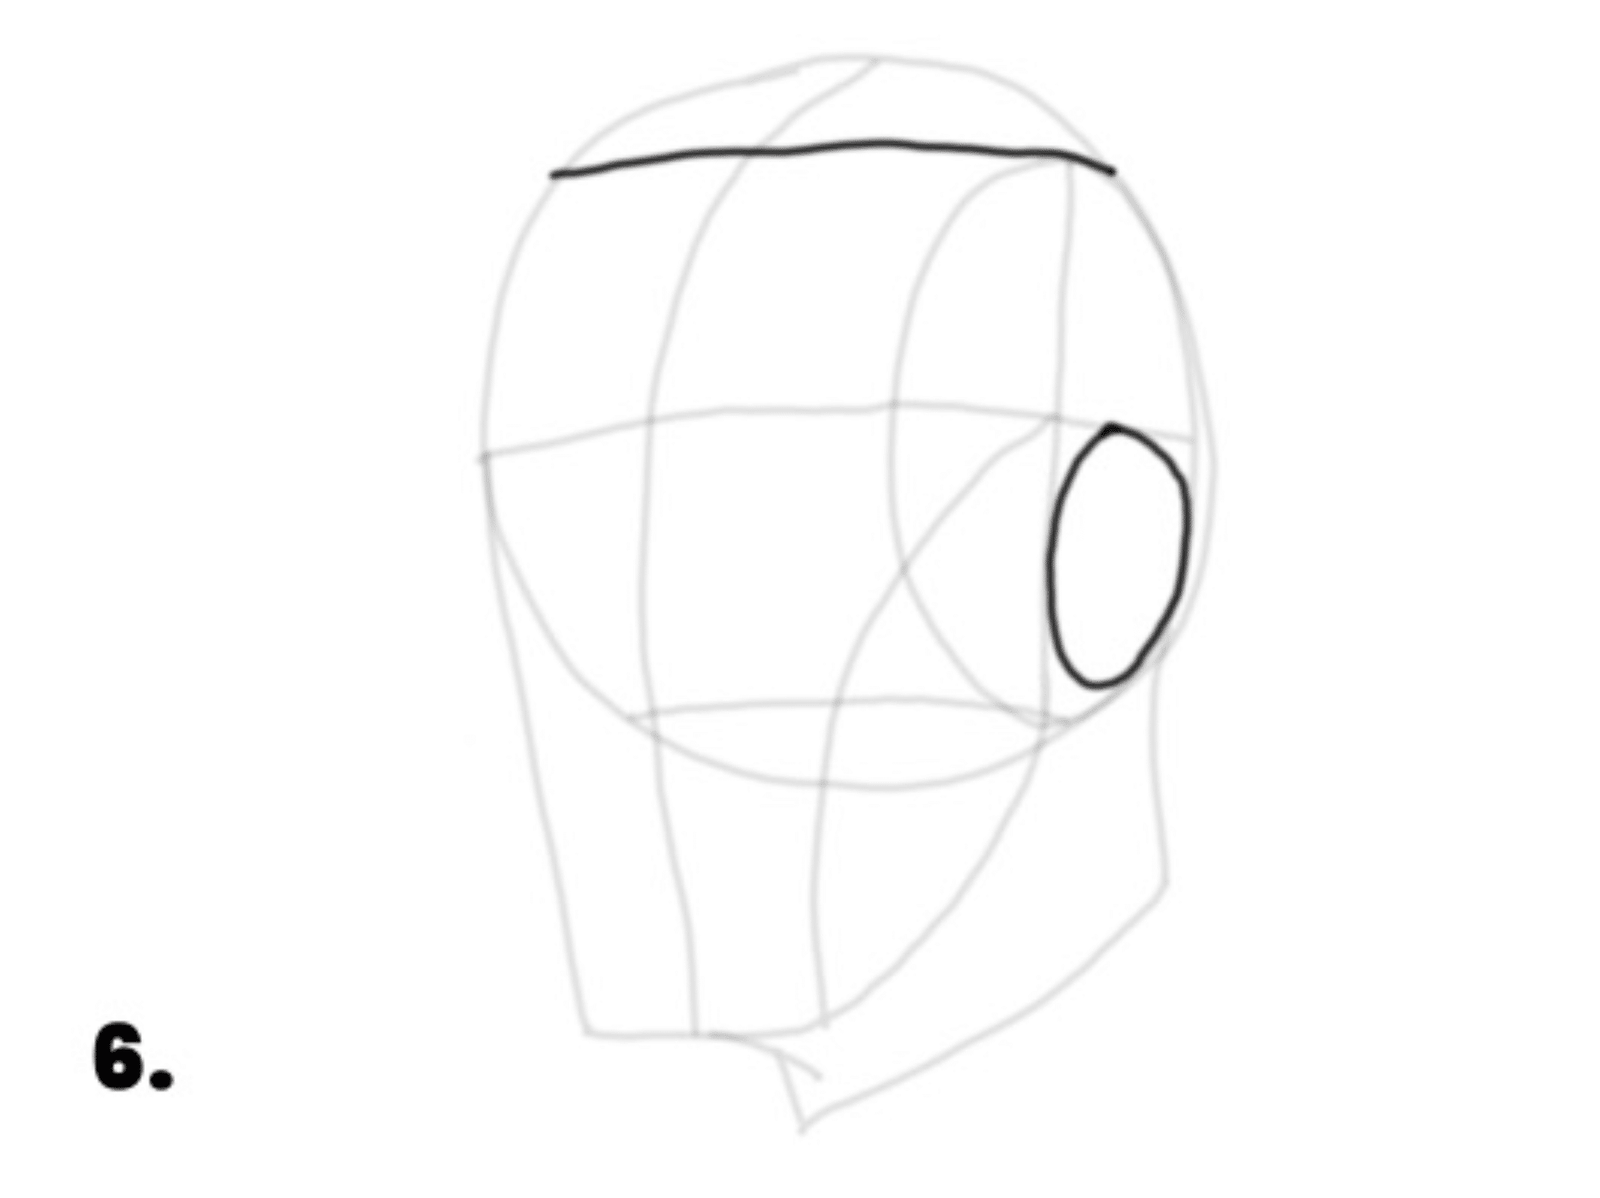
Step 5: Center Line, Neck, Hairline, and Ear
The center of the face is established, the chin and neck are drawn, and a line above the oval defines the hairline. At this point, we can place the ear, completing the basic framework of the head.
Conclusion
The Loomis method, still used today, offers an easy approach for constructing the head, providing a solid foundation upon which the portrait’s features can be sketched. We establish the Rule of Thirds, which guides the placement of the eyebrows, nose, chin, and hairline. Through persistent practice and a focus on foundational shapes, artists can achieve accuracy and memorable understandings in their portrait work.
The Loomis method provides a reliable foundation for constructing the head, guiding artists through each step—from shaping the sides and positioning facial features to establishing proportions with the Rule of Thirds. By focusing on basic shapes and consistent practice, creators can achieve accuracy and deepen their understanding of portrait drawing.