This Is How I Sketch A Human Eye: In Just A Few Simple Steps
Beauty is in the eye of the beholder. In this blog, we are discussing how to sketch the human eye in simple steps, starting with just a couple of circles. And after that is the beauty.
Introduction
The eyes are what light up everything else in the world we see, from the moment we first open them until we lastly close them for the night. I wonder what a newborn infant thinks when they first enter the world, and all the flashes of colors, values, and textures consume them all at once. Without our eyes, the world as we know it would not be the same.
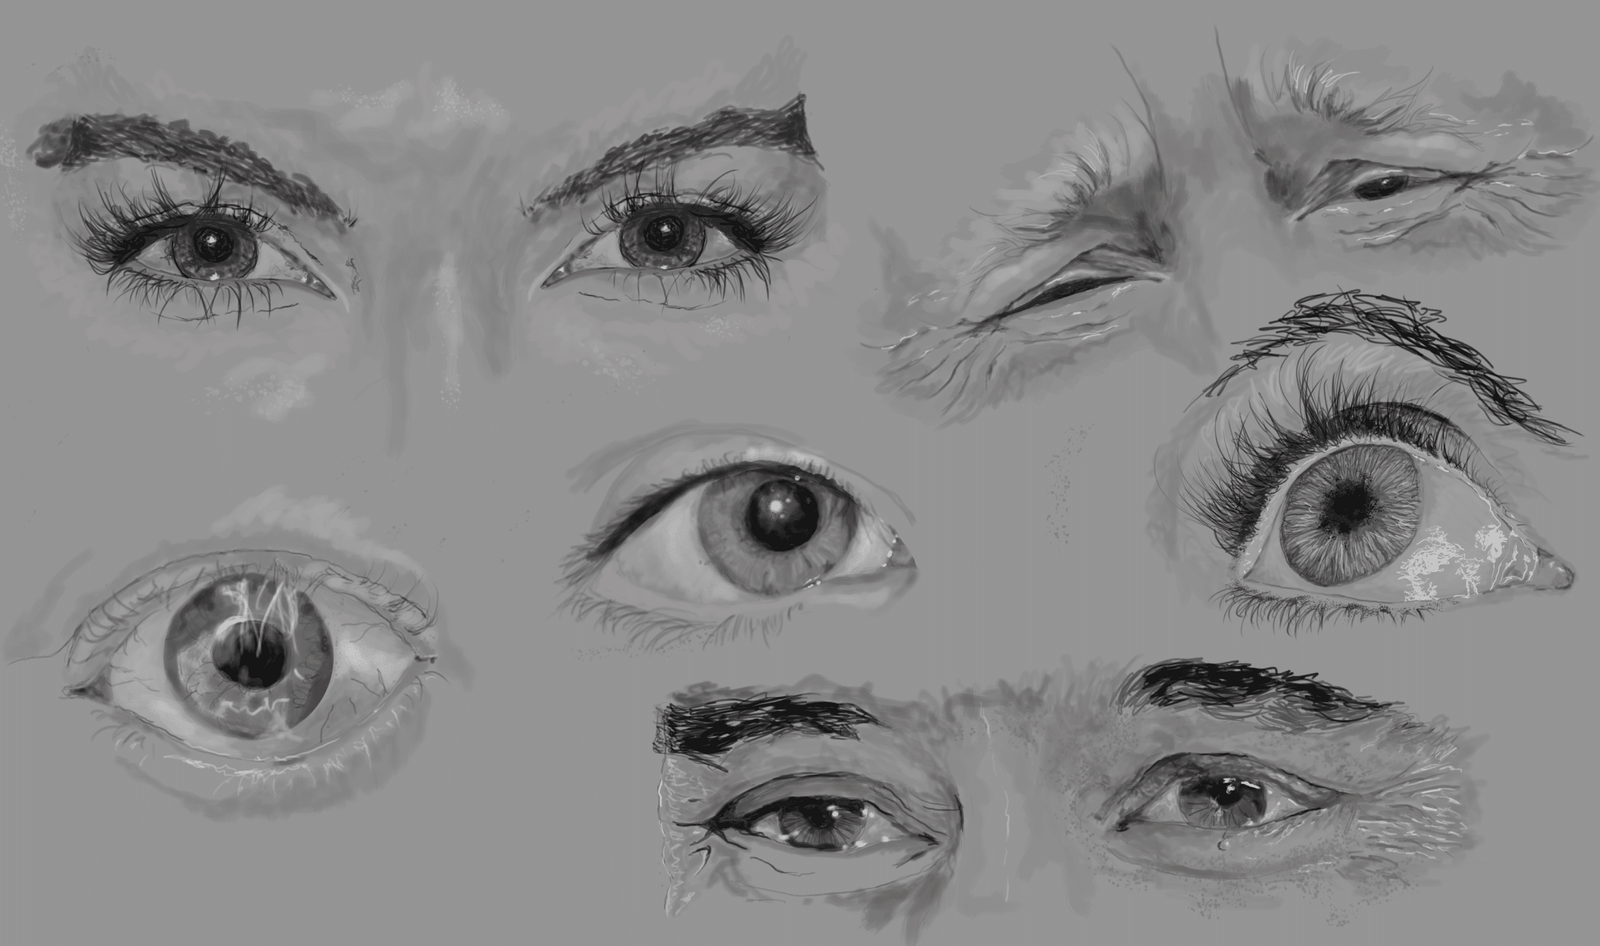
The human eye speaks volumes and is one of the most emotional features to draw. With the eyes, in most cases, one can speak without words. You can look at someone and tell whether they are mad, happy, sly, sleepy, or even lying. They’re a powerful feature and probably just as complex to sketch or paint. As I stated in my first blog, The Loomis Method: The Foundation I Use for Portrait Sketching, eyes will take practice and patience. So, practice, practice, and then practice some more, and don’t give up (and use references as you practice); it’ll happen! As eyes can speak without words, they can also elevate a portrait from being good to being exceptional.
In this blog, as in the Loomis method, we’ll break down the process into simple steps and tips so you can draw an eye.
Basic Guidelines and Placement of the Eye (Basic shapes)
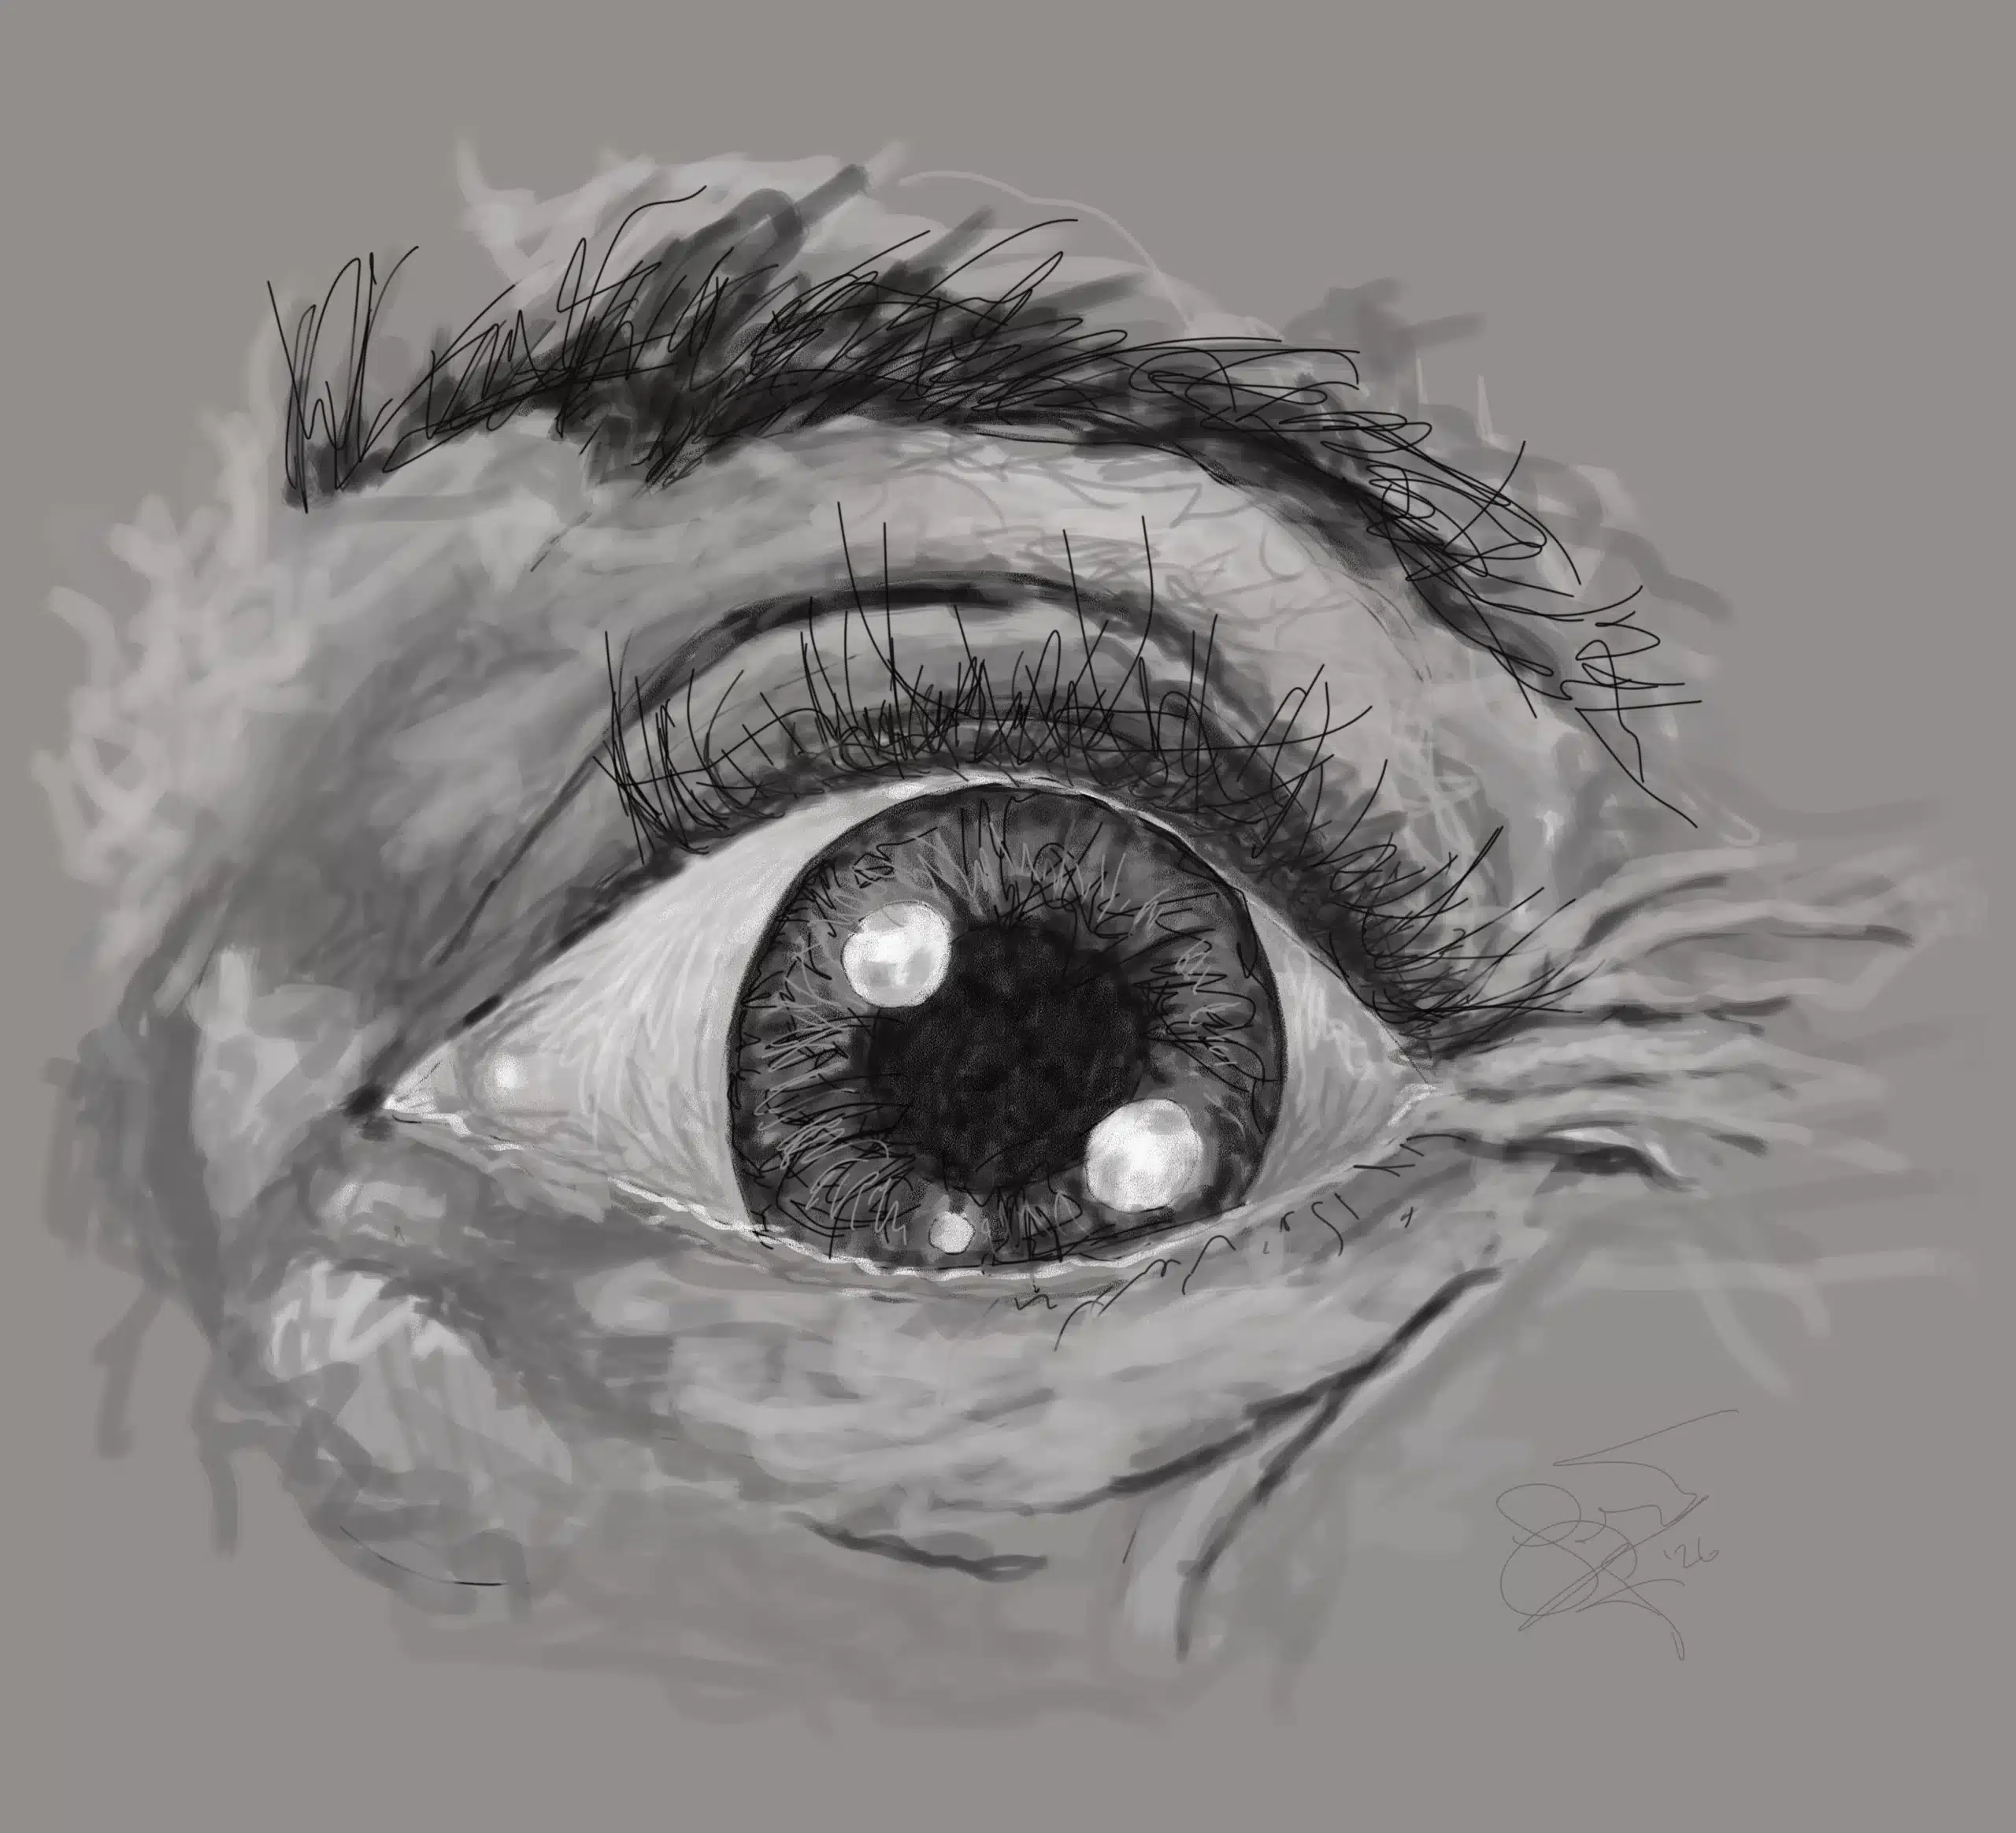
1. As we did in the first blog, we are going to start with a circle of sorts, an oval. This defines that it’s an eyelid, or the outline of an eye.
2. Then we will draw a circle within the oval; this is called the Iris. Take note: though the circles on top and bottom are not complete/seen, you won’t see the whole circle. This is also the most colorful part of the eye.
3. Next, we can draw what’s called the pupil or the dark circle within the Iris. If you go and shade this in now, make sure to have another circle within it (this is called the catchlight area). Our eyes, for the most part, are wet, and that’s why they are also shiny. It’s often the catchlight that brings life to the eye.
4. Then, on the bottom of the oval or the bottom of the eyelid, make a line for the eyelid creases and tear duct. You can make another line on top of the oval for the upper eyelid.
Shading the Eyes and Surrounding Areas
• If you haven’t already (which, in most cases, the artist does shade in the Iris when they sketch it), shade in the Iris, leaving the catchlight alone, as this is the light hitting the eye.
• As you shade in the Pupil with short lines that go out from the pupil to the edge, make some lines darker and some lighter. If you’re coloring the eye, you can choose several colors and lines for it. Where the catchlight extends out into the pupil, leave it white again.
• Ah! Shading the whites of the eyes (the Sclera), know that they are not actually white but a shade of white (the greys), where the darker areas will be darker, and the lighter areas will be lightest, where the darker areas are in shadow.
• Next will be the eyelashes along the edges of the lids. Where the upper lids are longer and curve up, and the lower lids are shorter and curve down. As we make our Eyelashes, let’s make them different sizes and give their directions different directions too. Be creative with them.
• As the catchlight area is hopefully the lightest part of the eye thus far, we will also make a light line under the eye to mimic moisture (these two characteristic elements will help make the eye look real).
• As we approach the end of the drawing, we’ll add the eyebrow with short hair-like strokes.
• And light shading for the skin texture around the eye, and highlighting any folds and wrinkles.
Fixing and finishing the drawing
• Darken the deepest shadows, like in the pupil, lashes, brow, and the iris, if need be, as well as lighten (erase) areas that may need less shadows.
• Clean up smudges with an eraser and sharpen lines that are important or need it. With that said, our eyes should be done!
Conclusion
Sketching the eye can be done in four simple steps: the eyelids, the pupil, the iris, and the top and bottom creases the eye makes on the skin. The next part is where you put your values in, and what will help your eye to pop! But I would like to stress that practice and building that perfect foundation are key (that’s where practice is going to help) in refining the look and feel of your eye. Don’t give up!
Learn to draw the human eye with simple, step-by-step instructions perfect for beginners and above. This guide covers basic shapes, eyelid and iris placement, shading techniques, eyelashes, and will help to build your skills fast. Follow the easy steps and helpful tips to create realistic, expressive eyes that make your portraits pop.